Automation Tips for Working With Audio and Video Files
Save some time in your process.
I spend most of my time writing, which means I'm usually in Google Docs or on my blog. Write, polish, publish, done – a lot of this happens within a single app.
Audio and video files are an entirely different ball game. I've only just started working with video, and it's a process. Recording the video, editing, storing a copy on my Google Drive, creating a cover in Canva, uploading it to my social media scheduling tool or YouTube... ay yi yi. And a lot of these apps don't work with automation tools.
If you work with audio and video files there are a few automations you can set up to keep yourself organized and make your life easier – particularly if you're working with any outside resources (like an editor).
- Create a project in your project management tool
- Notify someone that a raw file is ready for editing
For these automations, I'm using a few tools: Zapier [affiliate link] (running in the background), Dropbox, Trello, and Slack. However, you can swap out any project management tool for Trello. And if you're not a Slack person, you could also send notifications via email instead.
Watch the step-by-step on YouTube
Add files to Dropbox
Both of these automations are based on the same trigger: Add File to Folder in Dropbox.
In my Dropbox, I have a specific folder: Unedited Videos. You can use any name for your folder.
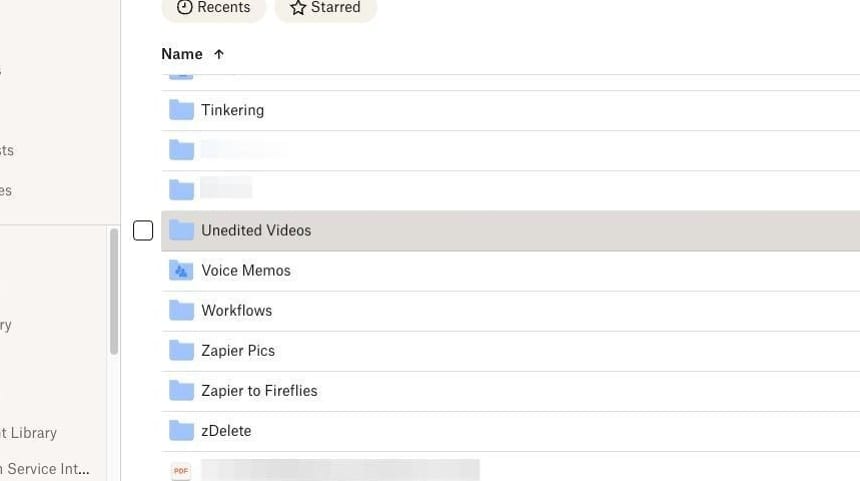
In Zapier, my starting step is New File in Folder.
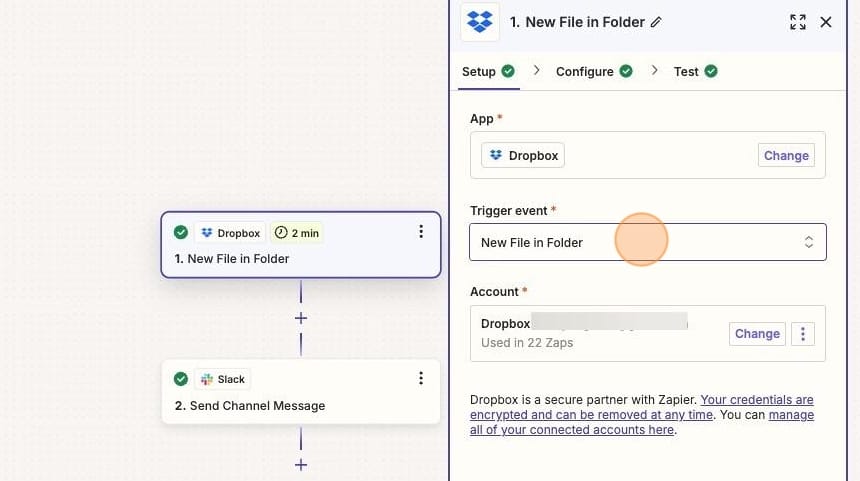
When I configure this step, I tell Zapier to look specifically for a new file in my Unedited Videos folder.
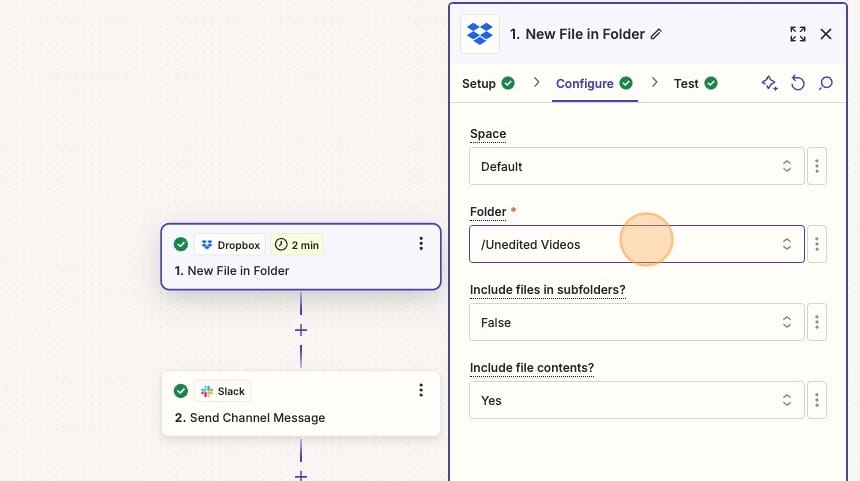
In the following examples – setting up a project in Trello and sending a notification in Slack – I'm using the same Unedited Videos folder. But you don't have to do this. You could use two different folders as your starting points for two different automations.
Create a project in your project management tool
Let's say you have a podcast. A project management tool keeps your episodes organized, and you can "move" the project through different stages of the process, from recording to editing to publishing.
I worked with a podcast host to set up a process to add a new project to her project management tool (Trello) whenever she was done recording an episode and had moved the raw files into her Dropbox folder. From there, her podcast editor and VA would complete their work getting the podcast ready to publish.
I use something similar with my own video editing process. Even though it's just me, I use Trello to track my videos. Otherwise, I'll forget about the unedited videos I have sitting in my Dropbox simply because I didn't have time to add them to my video editing tool at that exact moment.
When a new file is added to my Unedited Videos folder, I want a project set up in Trello.
This is a very simple Zap with two steps:
- New File in Folder (Trigger)
- Create Card in Trello (Action)
I also have a date/time formatting step. I'll explain why I have this, but it's not necessary.
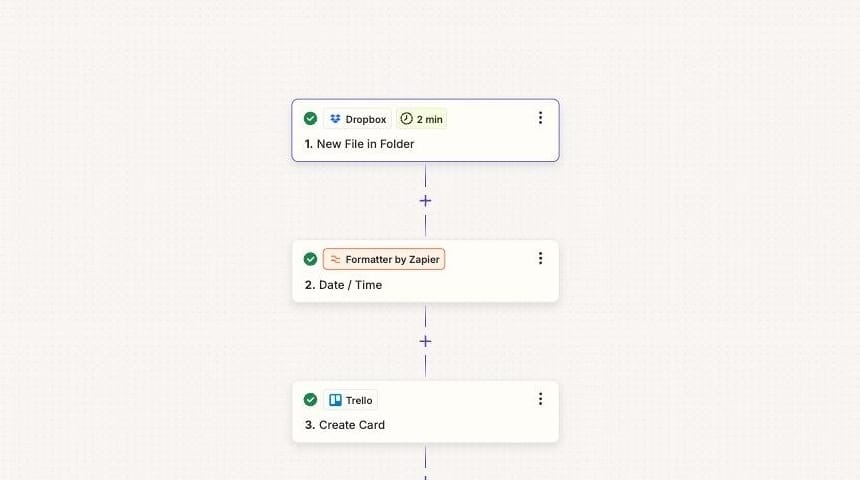
Once you have your first step set up (New File in Folder), you'll set up an Action Step to create a new project in your project management tool. In Trello, projects are called Cards.
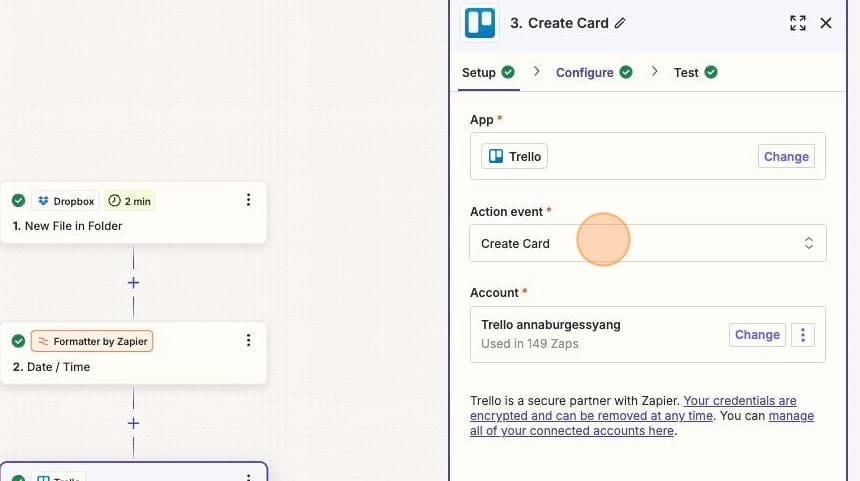
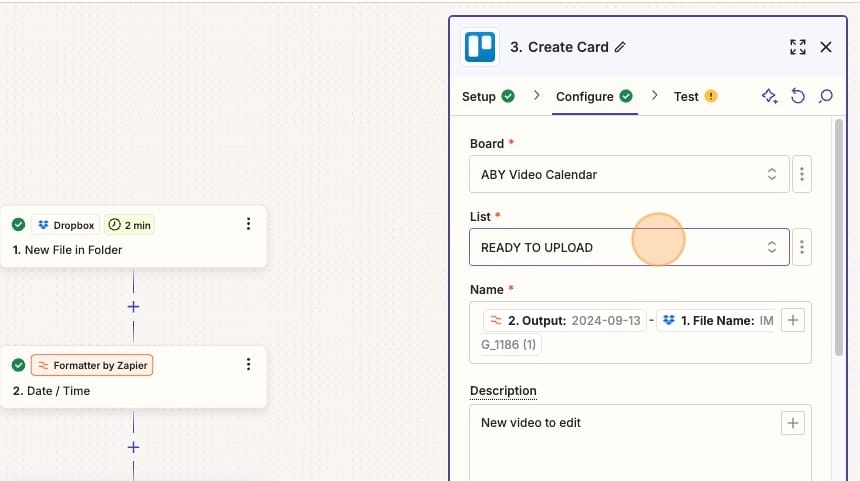
In Trello, cards are organized by Lists (stages in the process). I want to add my Trello card to my starting stage, which is READY TO UPLOAD.
I also have to give the project a name. I name my projects YYYY-MM-DD - FILE NAME.
This is why I need a formatted step. The file's Create Date in Dropbox includes a timestamp. I use a Formatter Step to modify it to YYYY-MM-DD. You can read more about date formatting here. But this is a completely optional step – I only need it because I like the date in my Card Name in Trello.
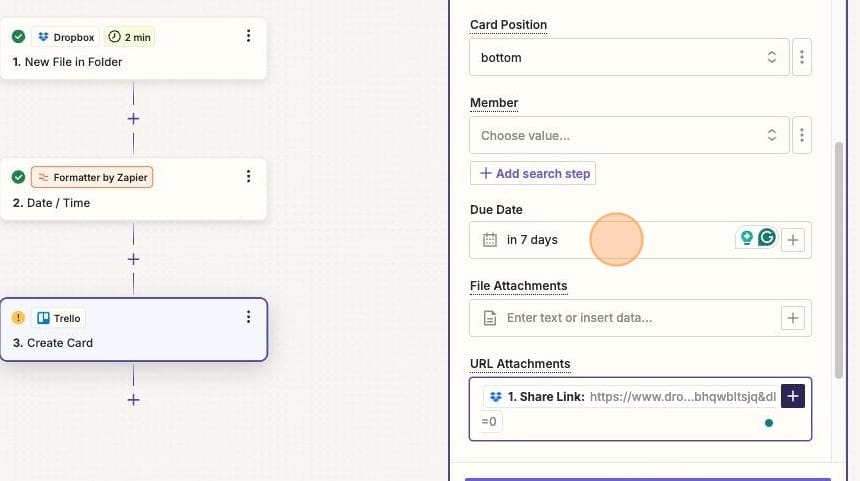
I also add a Due Date to my Trello card. I like to publish videos within 7 days of recording them. If your projects are more date-dependent (like a podcast), you'll want to make sure to add a Due Date.
Then I add the URL from Dropbox. This makes it easy for me to access the file from within Trello.
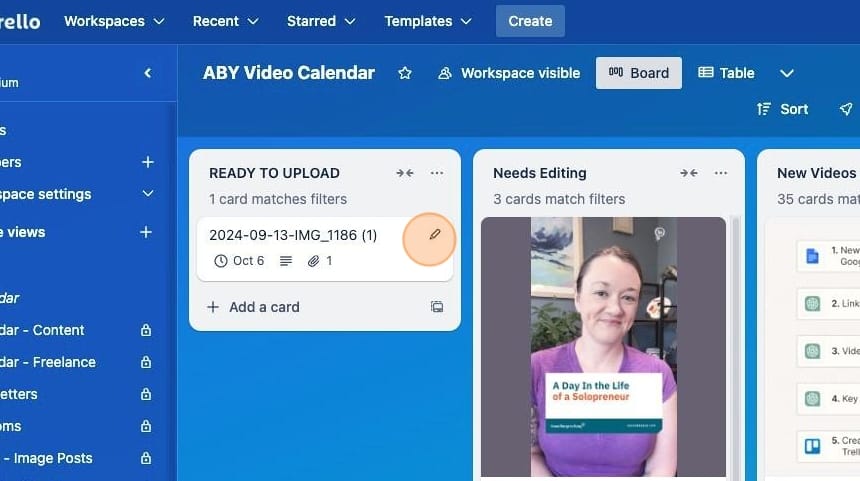
Whenever I add a new file to my Unedited Videos folder, a new card is automatically added to Trello.
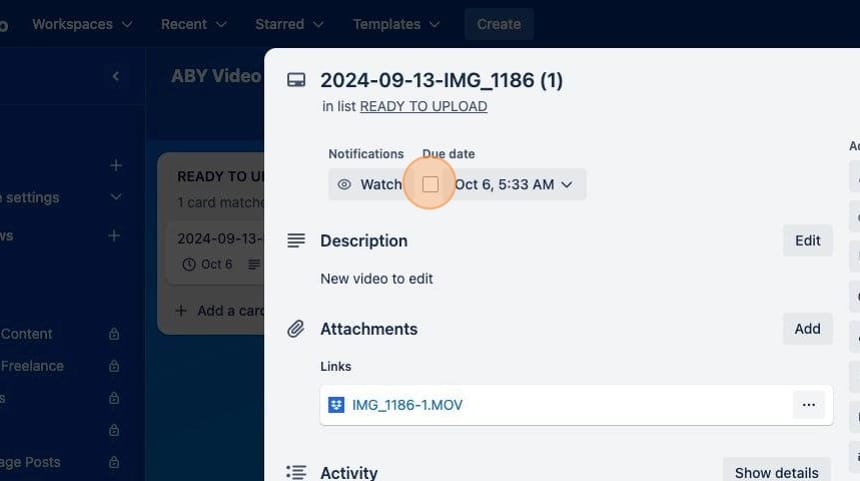
When I open the card and look at the details, I can see the Due Date and Dropbox URL.
Notify someone that new files are available
Adding new projects is a GREAT first step, but what if you're working with a contractor or colleague who may not be working in that project management tool all day, every day? You need to let them know that new files – and a new project – are available.
This next automation sends a Slack message when new files have been uploaded. As I mentioned above, you could easily swap out sending a Slack message for sending an email.
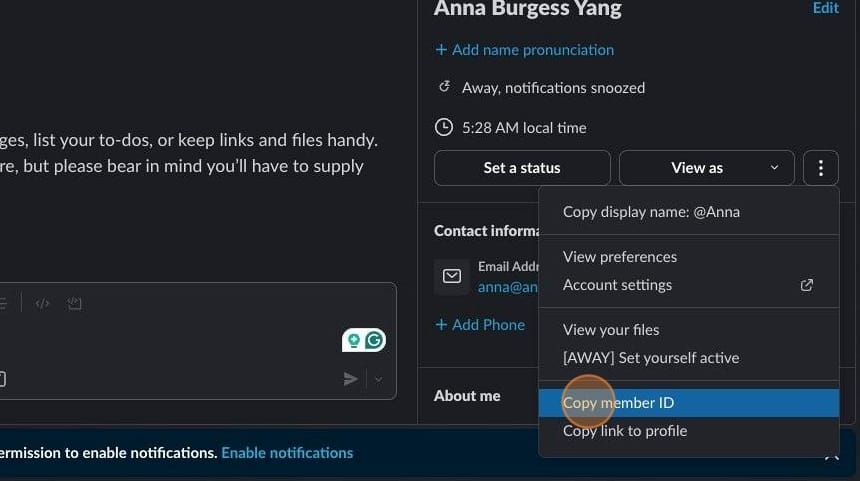
If you want to use Slack and you want to @ a particular person, you'll need that person's member ID from Slack.
In Slack, go to that person's profile. Click the button with the three dots.
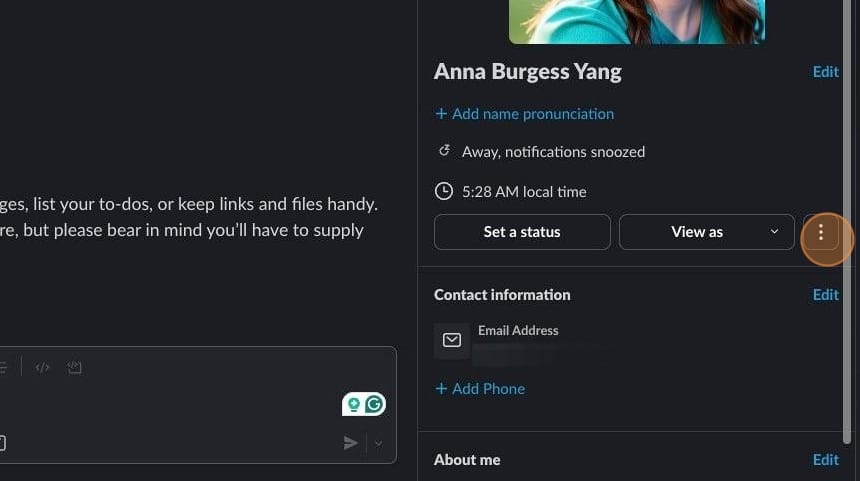
From the menu, select Copy member ID. This will copy the ID to your clipboard.
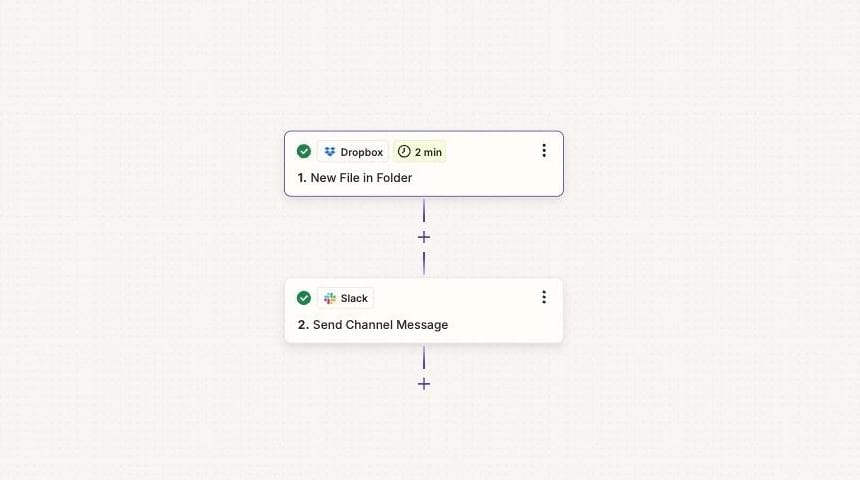
In Zapier, this automation has two steps: a Trigger Step of a New File in Folder from Dropbox and an Action Step of Send Channel Message.
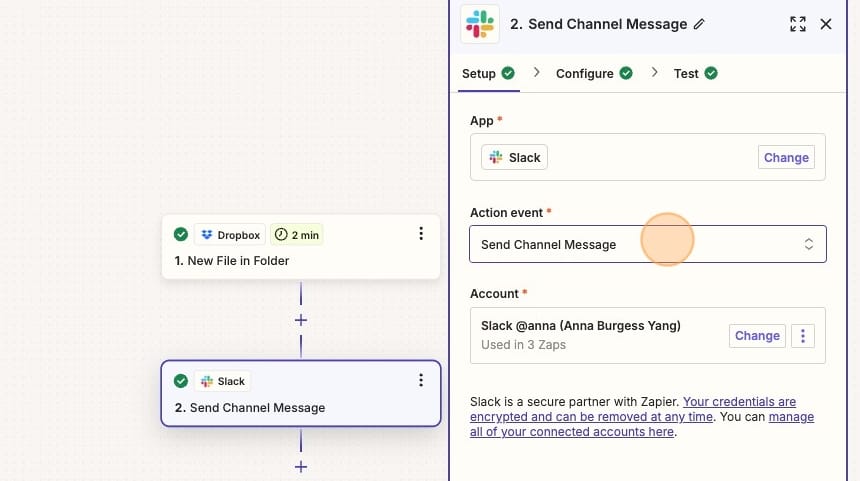
Here's the first screen of your Slack setup. If you're connected to more than one Slack workspace, you'll need to choose the right account.
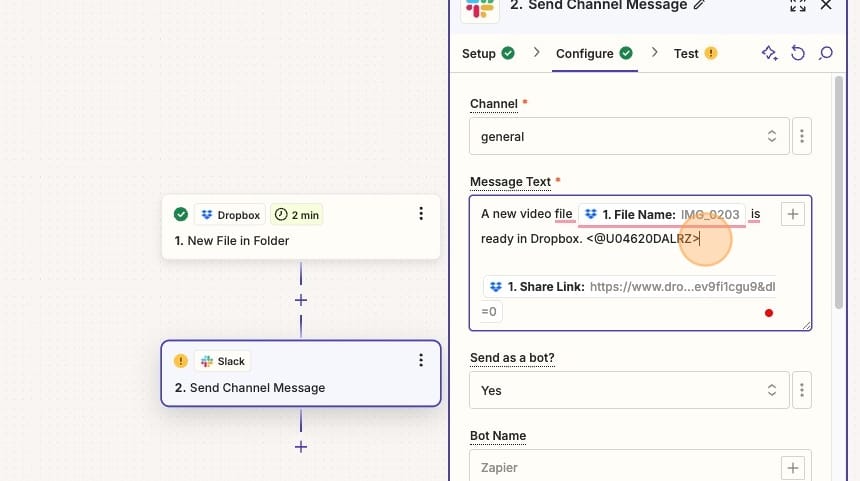
In the configuration, you'll select the Channel and type in your Message Text. This is where you'll need to add the pasted Member ID from Slack. The ID needs to include angle brackets, so the format is <@MEMBERID>.
Here's a help article about Slack formatting (including other message formatting like bold and italics).
Add the Dropbox URL to make it easier for the person to access the file.
With this Zap, you'll get a message like this every time a new file is added to Dropbox.
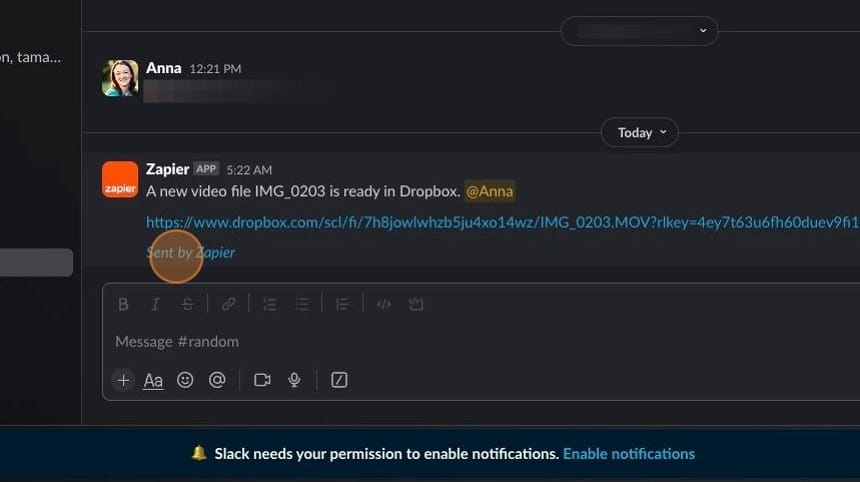
Note: These two automations don't have to be two separate Zaps. You could have one multi-step Zap, like this:
- New file in Dropbox folder
- Add project to your project management tool
- Send notification via Slack or email
I only created two automations to show the setup for people who may want to do one and not the other.
Other ways to automate your work:
- Send a Slack or email notification when a project moves through the stages of your project management tool. This works well if multiple people are involved, each at different stages.
- Add YouTube URLs to a spreadsheet or database when they're published (I use Airtable [affiliate link] for this). That way, you have a record of your published videos. Mine looks like this:

More resources:
- Looking for ways to incorporate AI into your process? Here are 5 AI Tools for Solopreneurs (that are actually useful)
- I use Trello a lot to manage my backlog of content ideas. Here is a way to randomly select ideas to work on.
- I wrote about the importance of human creativity (especially with the rise of AI).
- Not sure what tools you need as a solopreneur? Here's a free guide.
I created the screenshots in this tutorial using Scribe – it's one of my favorite tools. You can check out Scribe here [affiliate link].


