How to Organize Your Standard Operating Procedures
As your business grows, you'll need SOPs.


If you're creating standard operating procedures (SOPs) for your solo or small business, you'll eventually end up with dozens of documents. Maybe even hundreds.
Think of every little thing you do during the day. Ideally, you'd create an SOP for it. Someday, if your business grows, you'll be able to hand over that SOP to a virtual assistant, some fractional help, or even a full-time employee.
I won't cover the value of creating SOPs (you can read more here). Rather, I'm going to focus on how to organize your SOPs.
Step 1: Decide how you want to categorize your SOPs
Many companies store SOPs in Google Drive or within an app like Notion.
The problem with that? You're forced to "fit" your SOPs within a linear filing system. You put the Google Doc in one folder. You store the Notion doc within one notebook. Sure, you'd have subfolders and can cross-reference, but that's a lot to maintain. And some of your SOPs may apply to more than one area of your business.
A database is far better suited for this type of organization. I use Airtable, but Notion also has some database functionality.
For each SOP, I want to apply two different categories:
- Project: the area of my business the SOP applies to
- Apps involved: Any tools I'm using to get the work done
A single SOP can be tied to more than one project and more than one app.
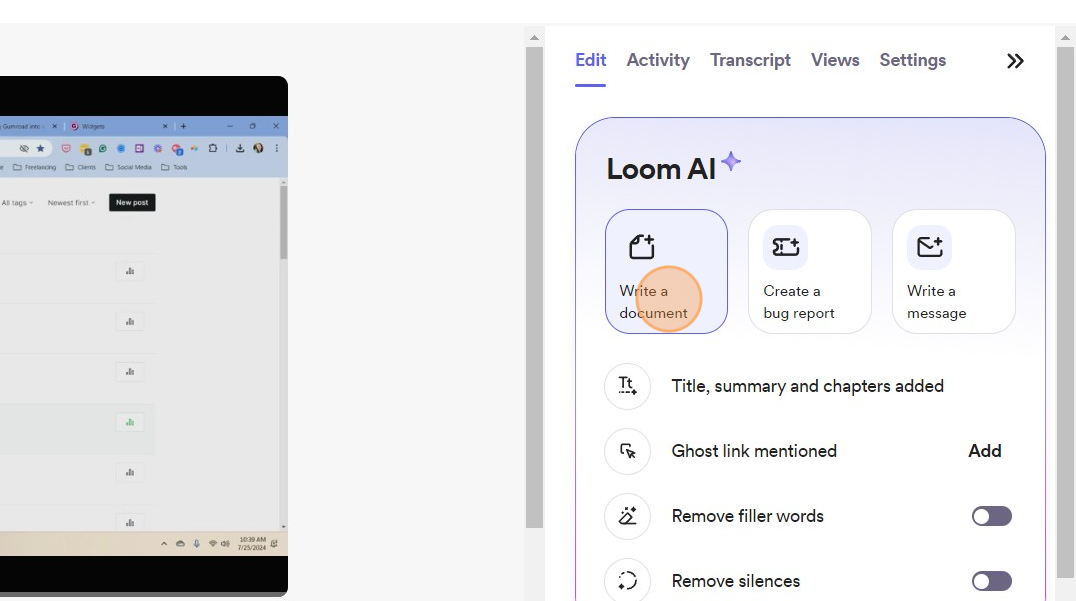
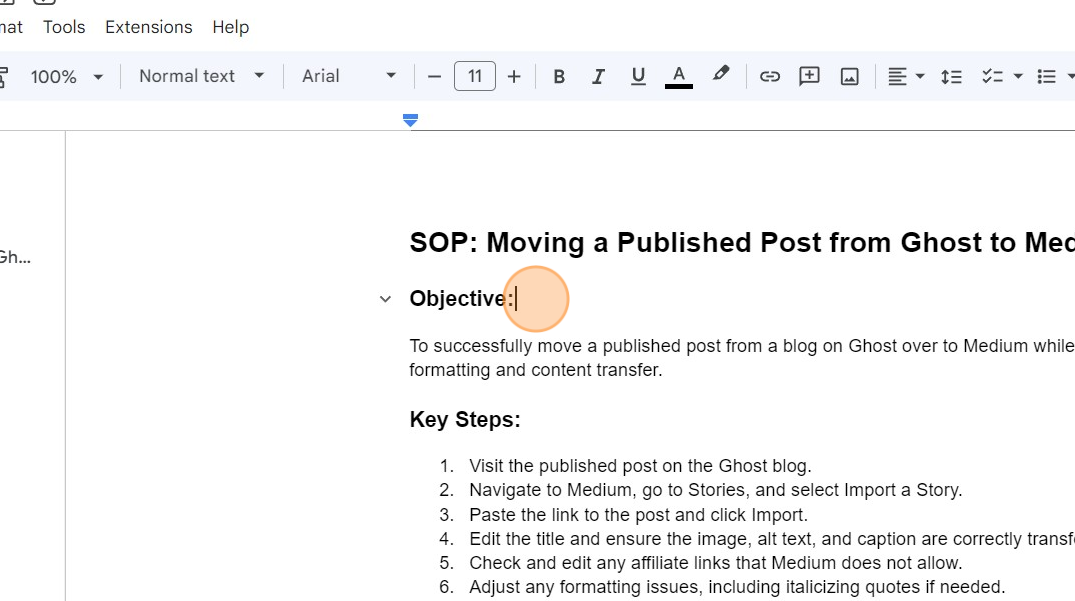
Step 2: Create an SOP doc using Loom AI
I use Loom to record a quick video of myself describing the process. Loom AI can turn your recorded video into written content. And the SOP feature is kind of scary good. Usually, I have to make some minor tweaks but not much. Plus, the output is in a standard format.
At the time I'm writing this, AI is an add-on feature to Loom's monthly subscription plan, but it's totally worth it for this SOP functionality alone.
You'll see Loom AI next to your recorded video. Click on "Write a document." On the next screen, you'll see an option for SOP.
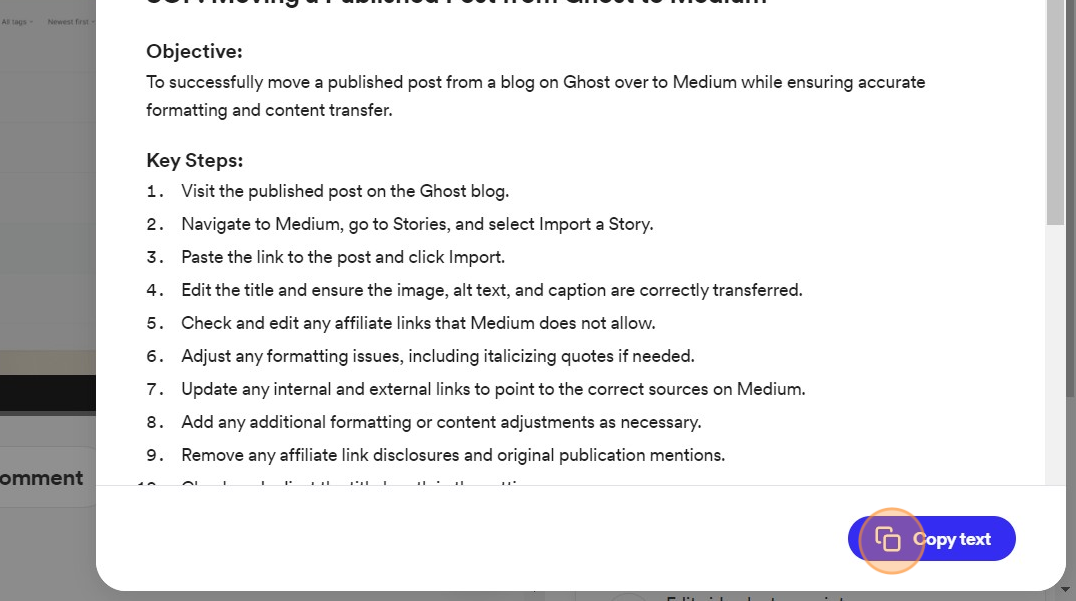
Once your SOP is generated, you'll select the "Copy text" button at the bottom of the screen.
Step 3: Paste the SOP into a Google Doc
Next, you'll paste the SOP into a new document in your Google Drive.
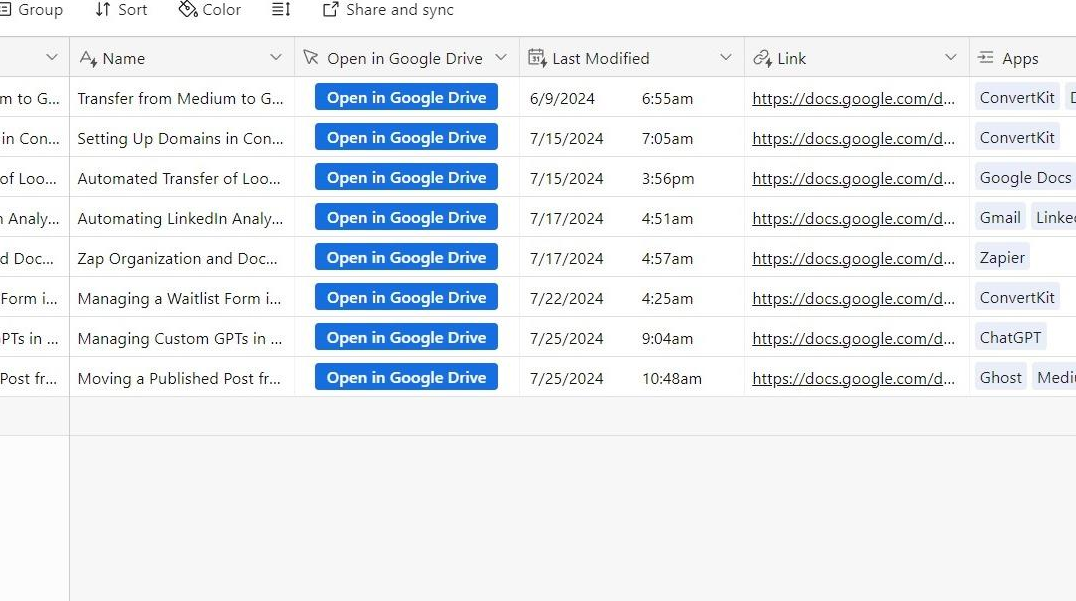
Because my organization happens in Airtable, all of my SOPs are within a single folder.
I'll do some light editing in my Google Doc. I'll name the doc with whatever name Loom generated, except I remove "SOP" from the beginning (since that feels redundant).
Step 4: Organize your SOPs in Airtable
My Google Drive folder for my SOPs automatically syncs to Airtable. (You can check out that process here.) So every time I add a new document into that specific folder, it shows up in Airtable, along with the name, a link to the doc, and when it was last modified. Some other fields are available to sync, but I don't use them.
I only need to link the SOP to the Apps and Projects. I can select multiple apps or multiple projects.
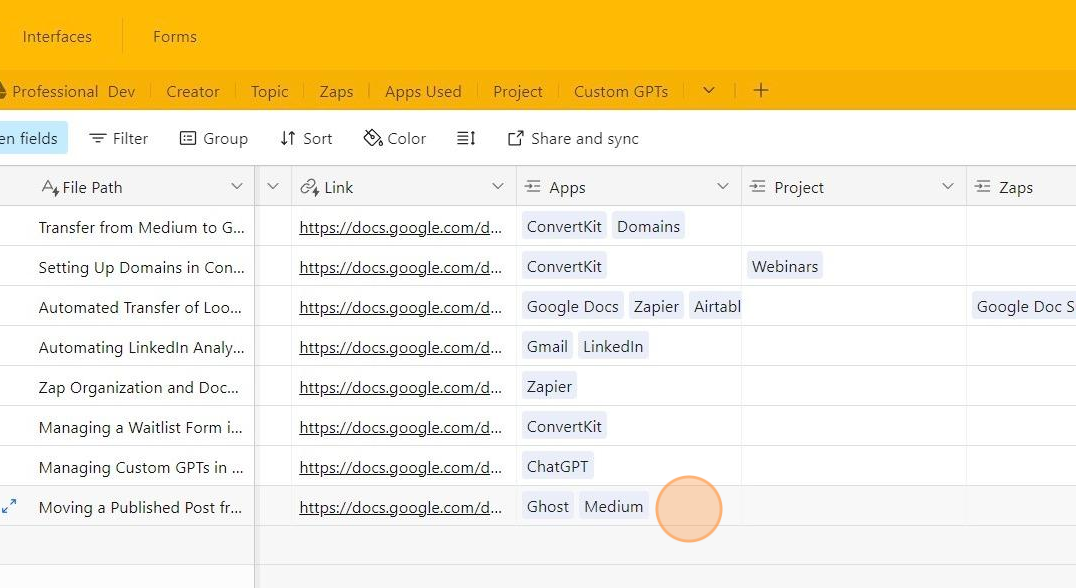
That way, if I want to see every SOP tied to a particular app or a particular project, I can use the filters in Airtable to find them!
More resources:
- Check out some tips for evaluating your tech stack.
- This guide outlines the tools you need as you start, grow, and scale your business.
- Want more ideas delivered directly to your inbox? Check out my newsletter.
I created the screenshots in this tutorial using Scribe – it's one of my favorite tools. You can check out Scribe here.
This article contains affiliate links so if you sign up, subscribe, whatever – I earn a small amount.