Extract Text from Screenshots and Create Notes
Make your screenshots accessible in your personal knowledge system.


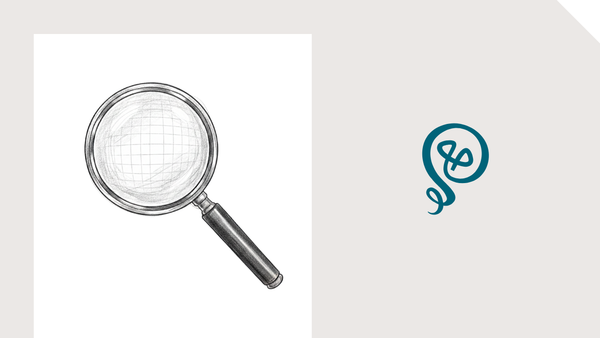
How many screenshots do you have saved on your phone right now? Hundreds? Thousands?
And what happens to them later?
Sometimes I take screenshots for the sole purpose of sending them to someone else. In other instances, I think, "Oh, that's interesting, I want to save it for later." And later is... never. Because the screenshot just sits on my phone.
I created a simple workflow to extract the text from a screenshot and save it to my note-taking app. At least in my note-taking app, I have a hope of using the information again.
The toolkit you need ⚙️
- Zapier [affiliate link*]
- Cloud storage of some kind (I use Dropbox for this)
- A note-taking app (I use Reflect, but you could use Notion, Obsidian, Google Docs, or anything that works with Zapier)
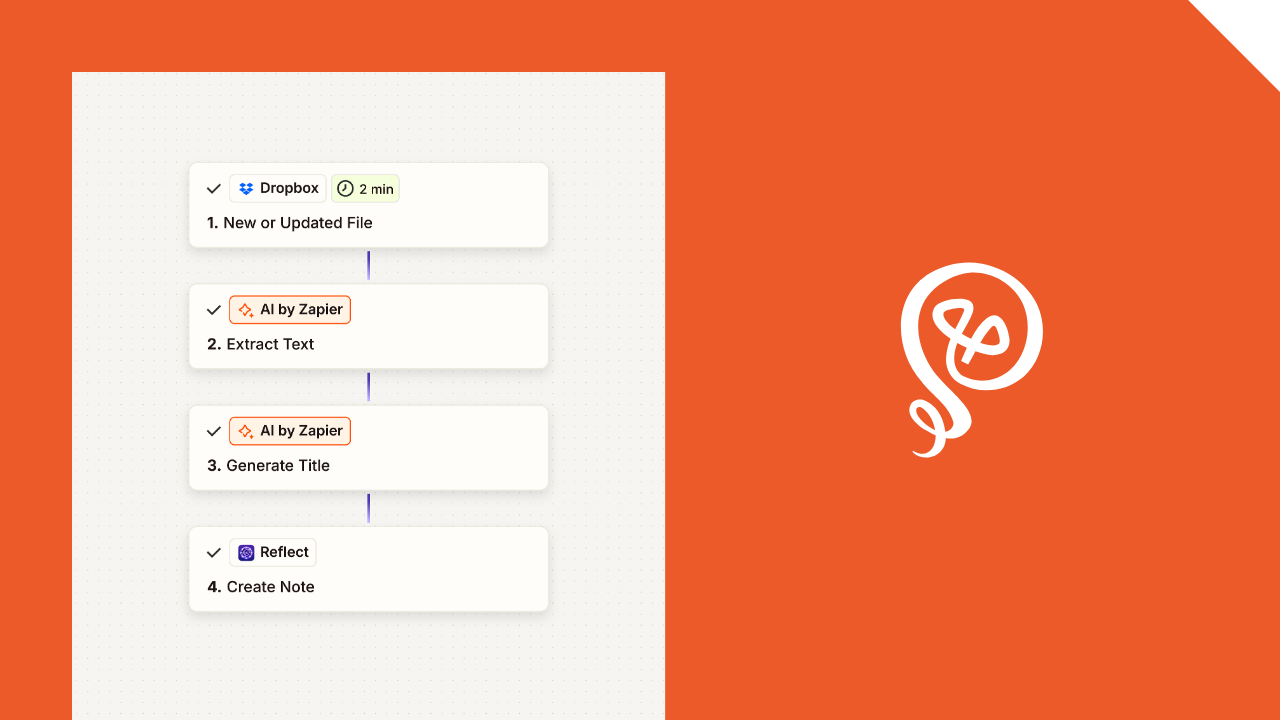
Step 1: Save your screenshot to your cloud storage
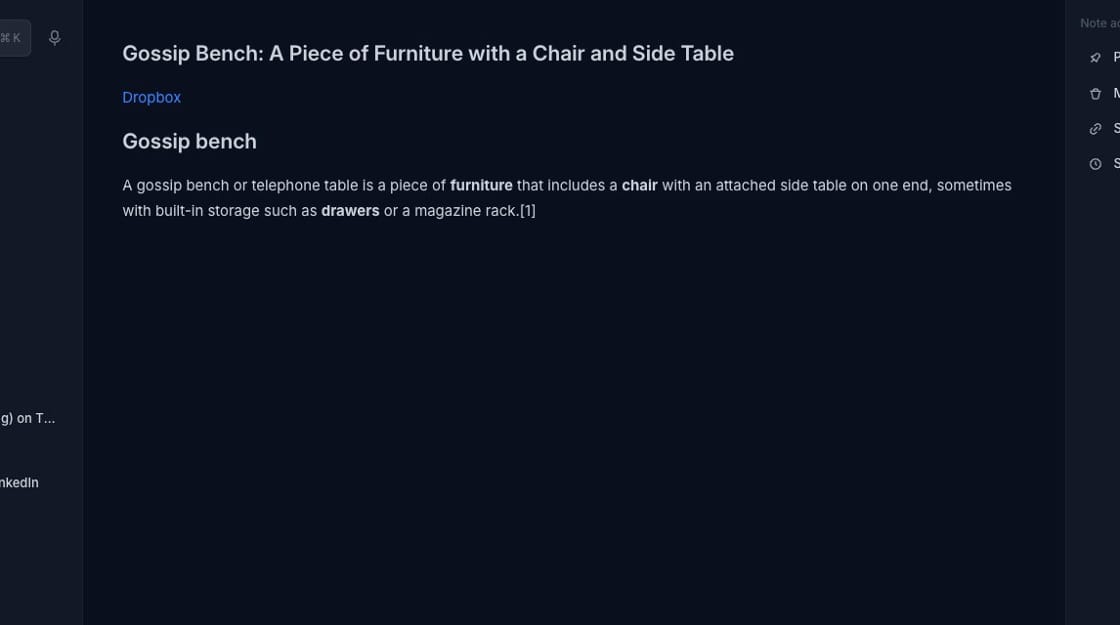
Here's a fun screenshot I saved from the Depths of Wikipedia Instagram. Who knows, maybe I'll want to write about a Gossip Bench someday.

To get started, I only have to save this screenshot to a specific folder in my cloud storage (Dropbox). I have an appropriately-named folder called "Online Stuff."

Saving the screenshot to a specific folder is the only "manual" part of this process going forward. Everything from now on happens automatically once you set up Zapier.
Step 2: Set up your Zapier trigger
Next, you'll set up a Zap with a trigger of "New File in Folder" for your online storage.
This is what it looks like for Dropbox. I specifically chose my "Online Stuff" folder. It would be similar for other online cloud storage, like Google Drive.
You do not choose a specific file, because you want this to trigger for all files added to this folder.

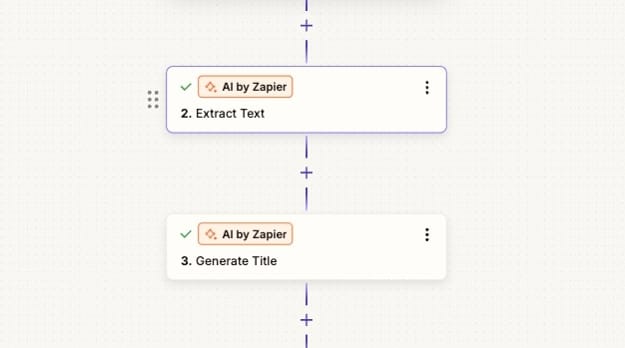
Step 3: Extract the text and create a title
I use AI by Zapier to extract the text from the screenshot. If you've not used this before, you can read about the setup here.
AI by Zapier is a premium app, so depending on your plan you might not have access. You could also use something like the ChatGPT app, but then you'd have to pay for API usage with OpenAI.
I use AI by Zapier to do two things:
- Extract the text of the screenshot
- Generate a title for the note I'll use in my note-taking app
To explain, in my note-taking app, I create a new note for each screenshot. It matches how I organize notes, because I add tags to categorize things.
If you don't organize notes that way and instead want to append a single note with all of your screenshot text, you wouldn't need the step to generate a title (unless you want the title as a "header" for your note within the single doc).
In the AI by Zapier prompt builder, you need to pull in the File from your first step. You can see it here in the "Input Fields." For Dropbox, this shows up as "File: (Exists but not shown)." Basically, it's pulling the contents of the file – an image, in this case – into the prompt.
In my prompt, I wrote:
Extract the text from this image. I need this in HTML so I can add it to a personal knowledge system. The text will never contain a hyperlink, so if you see a potential URL in the text, extract it as only text and not a URL.

I specifically chose to prompt HTML because of how I put notes into my note-taking system, but plain text is also fine.
I had a lot of issues with AI by Zapier attempting to "insert" hyperlinks that weren't really hyperlinks, so that's why I added the instruction to ignore any potential URLs.
Click "Generate preview" and you can see the output. Here's my Gossip bench.

Next, I create a header for my output. In this case, the Input field is the output from my prior AI by Zapier step: the extracted text. This step has to know what that text says in order to create an appropriate header.
My prompt is:
This is the extracted text from an image I saved online. I want you to give this text a short title that I can use to create an article in my personal knowledge management system.
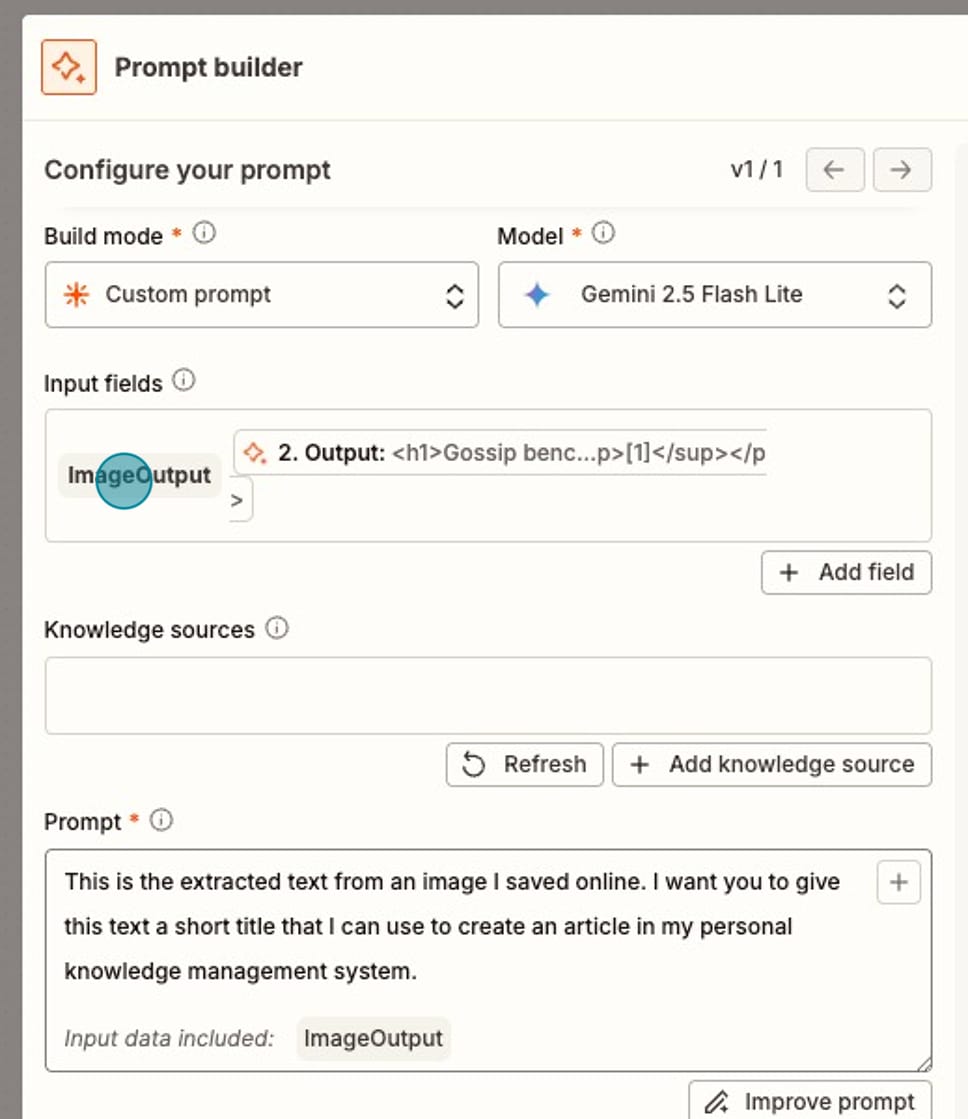
Click "Generate Preview" to review the results. I don't care a ton about the output here, as long as it is descriptive.

Step 4: Create a note in your note-taking app
In your last step, you'll add the screenshot output to your note-taking app or personal knowledge management system.
For Reflect, I can add a Note Subject which is my output from my second AI Step (the generated title) and Note Content HTML (or Note Content Markdown).
I choose HTML because I get a little fancy and actually add the link back to the original Dropbox image, so I can click over to it. But that's not necessary. You can simply include the output from your first AI by Zapier step (the extracted text of the screenshot).

Here's what the created note looks like in Reflect.
Pro tips:
- Once a week, I go through my created notes and add Tags in Reflect. I could probably get AI to do this at some point, but right now I want my eyes on the notes so I can make a decision.
- If you want to do different things based on the type of screenshot, you can create multiple Dropbox folders and set up Zaps to do different things. Like one might be "Research" and another is "Just for Fun."
More resources:
- How to build a note-taking system you'll actually use.
- How to save articles to your note-taking app with Readwise.

Want to see what automation actually looks like in a solo business?
Check out my free guide.