Collect and Organize Content Ideas
Save ideas from anywhere.


Ever see an article or social media post on the internet and think, "Hmmm... I could use that in my own content."
Happens to me all the time. I want to save interesting things I see – articles, social media posts, reports, etc.
I use this process multiple times per day to collect and organize ideas.
Here's how it works.
Step 1: Bookmark ideas using Pocket
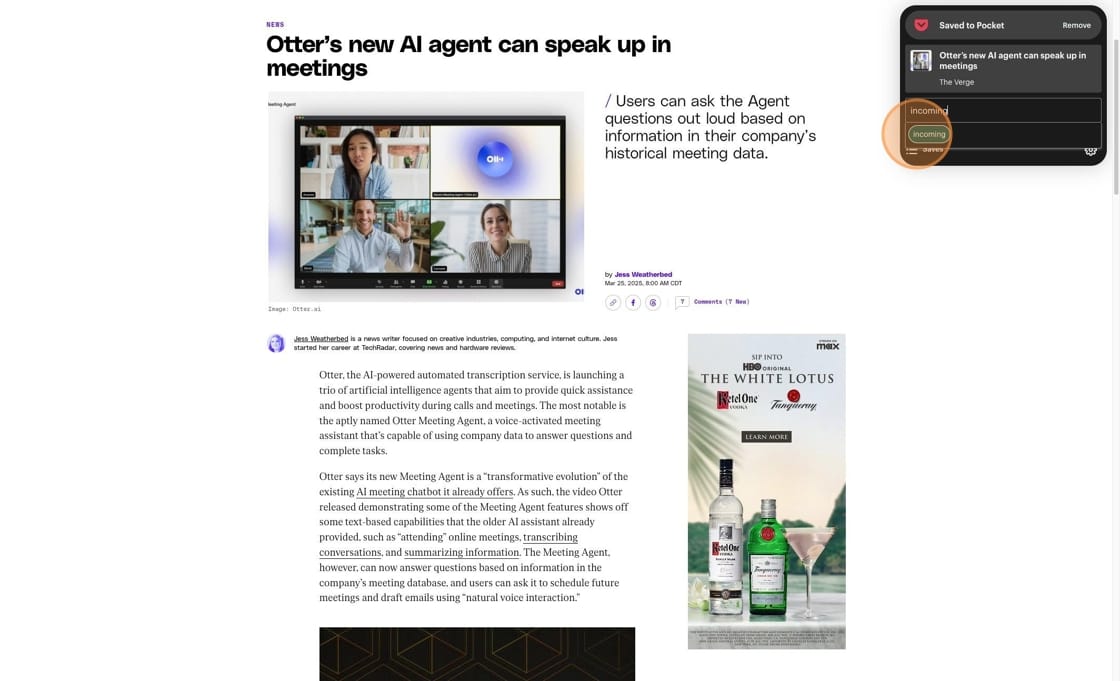
There's a free app called Pocket that lets you bookmark anything on the internet using your web browser or mobile device. If it has a URL, you can save it.
Let’s say I read an article and I think I might want to include it in a future blog post. I click the Pocket Chrome extension while I'm on the webpage (more info here, along with info about the mobile app).
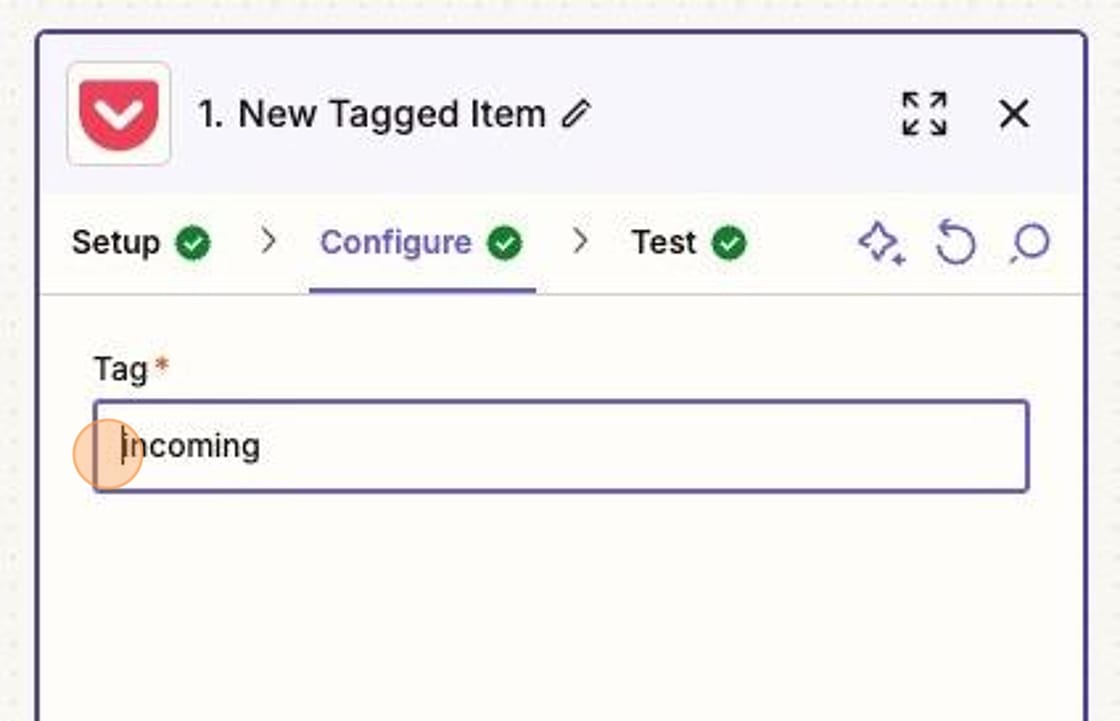
I have a Pocket tag called “Incoming.” I use this tag for anything I want to use in my content planning. You can set up whatever tags you'd like in Pocket.
(This is only one of many automations I have set up with Pocket – all based on Tags.)
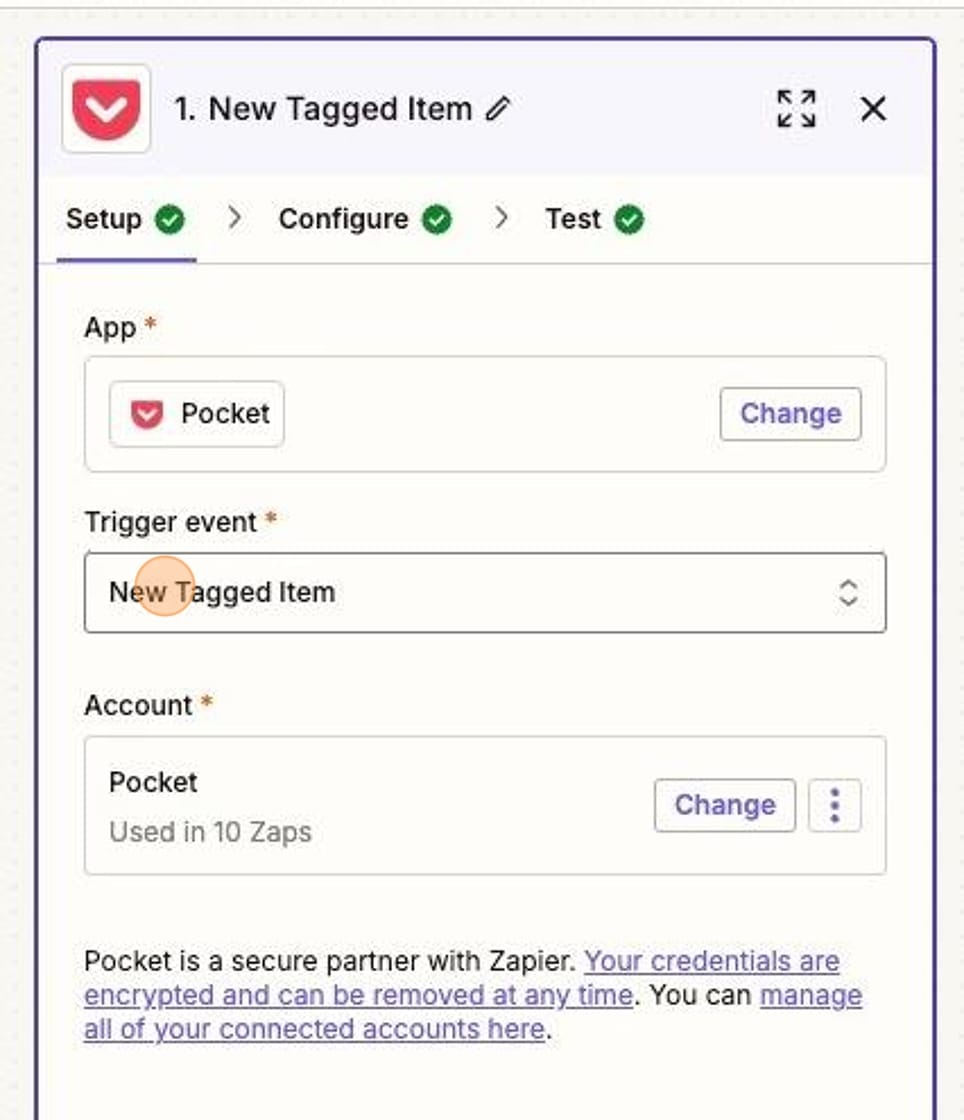
Step 2: Set up an automation based on Pocket tagged items
Next, I go into Zapier [affiliate link] to set up the automation.
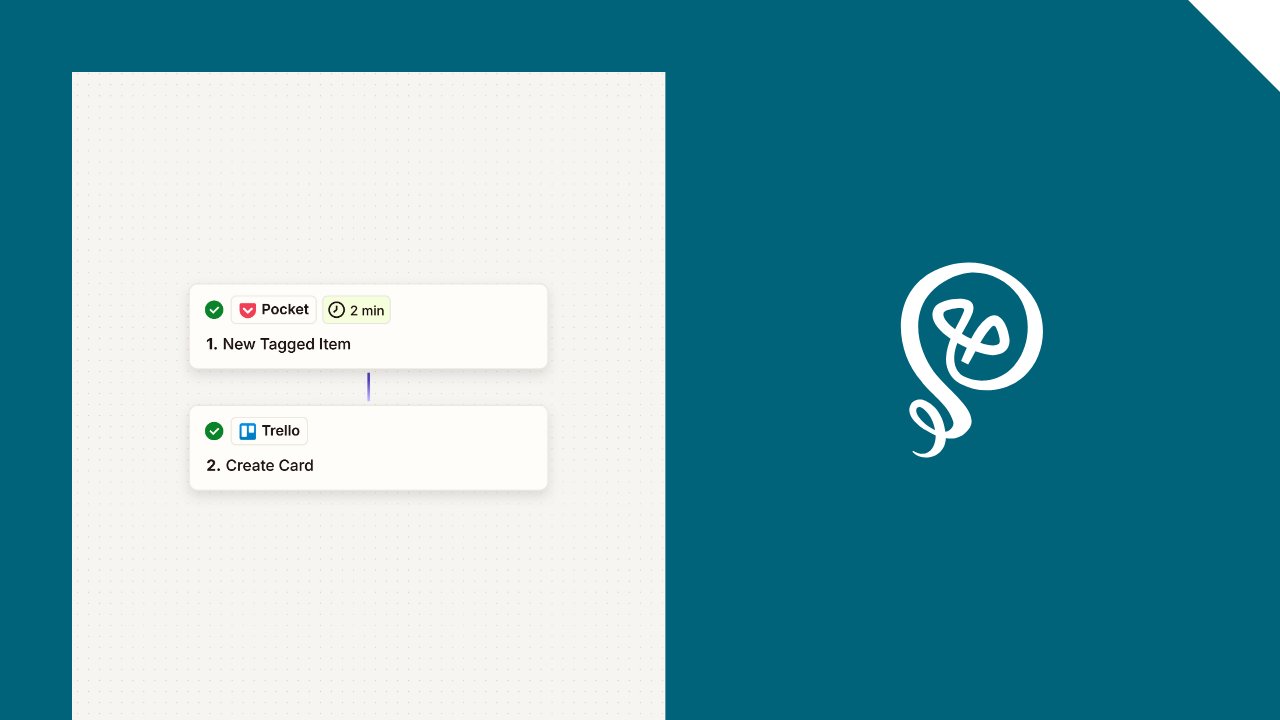
The trigger step is Pocket, and the trigger event is a New Tagged Item.
I enter my tag's description: "incoming."
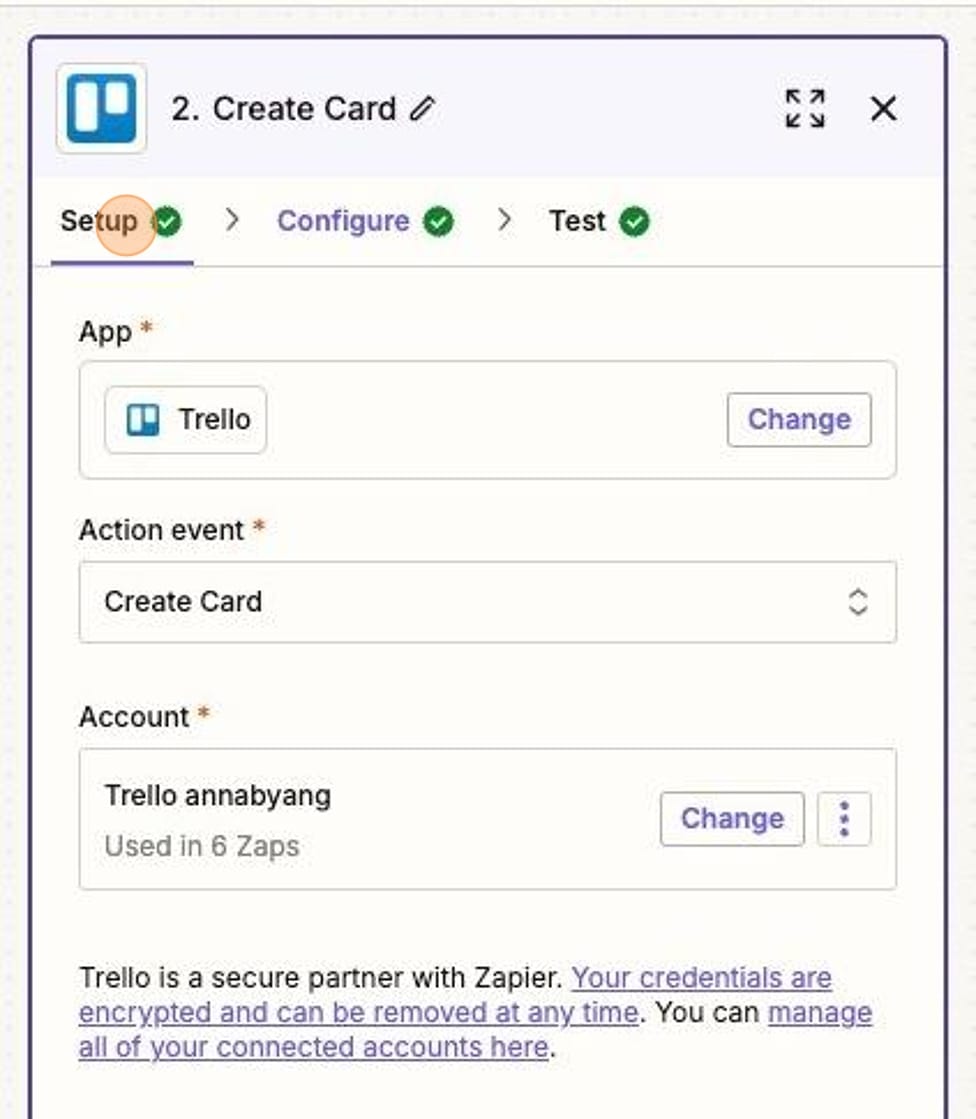
Step 3: Create an item in your content planning tool
I do all of my content planning in Trello, but you can use whatever tool you'd like (such as Asana, Notion, etc). You could even send your ideas directly to a social media scheduling tool like Buffer or to a GSheet.
In the setup for Trello, I select the action Create Card. The action will be a little different depending on the tool you use, but basically, you want to add a new record to the tool.
Trello organizes projects into Boards and Lists. Again, the organization will be different depending on the tool you use, but you'll basically select a project within your tool.
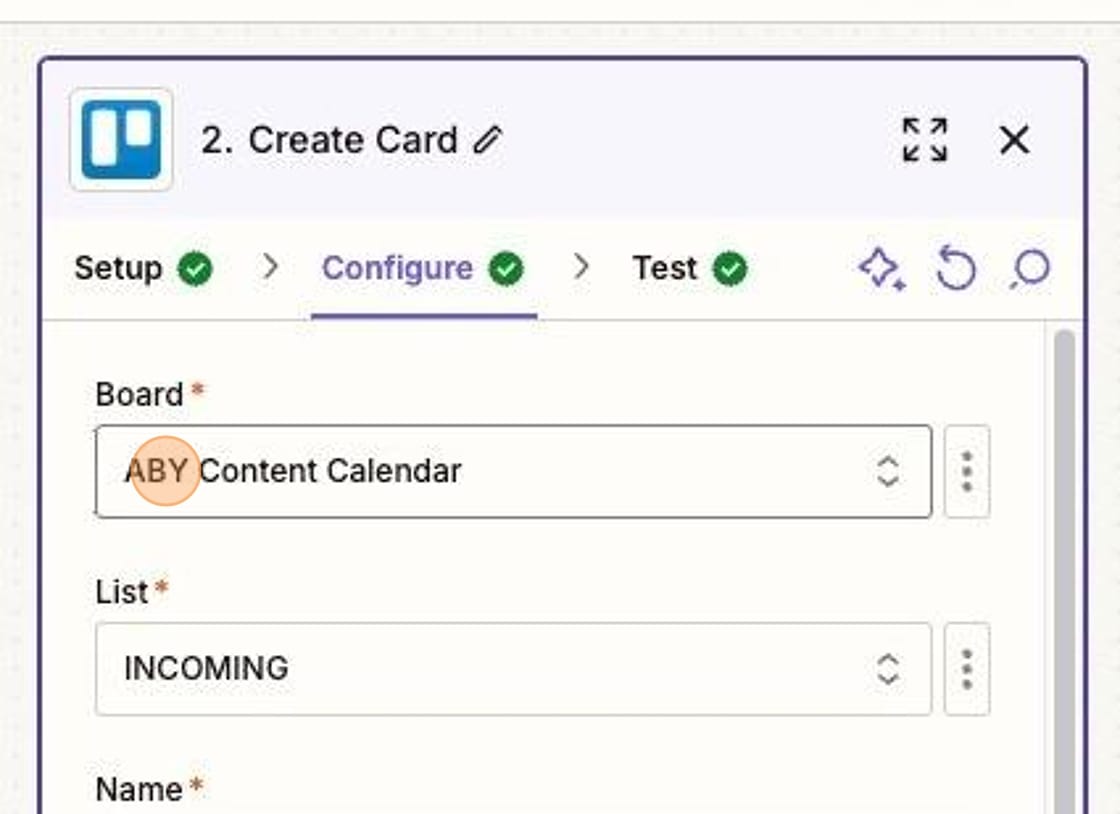
Trello requires each card to have a Name, and your tool will require something similar.
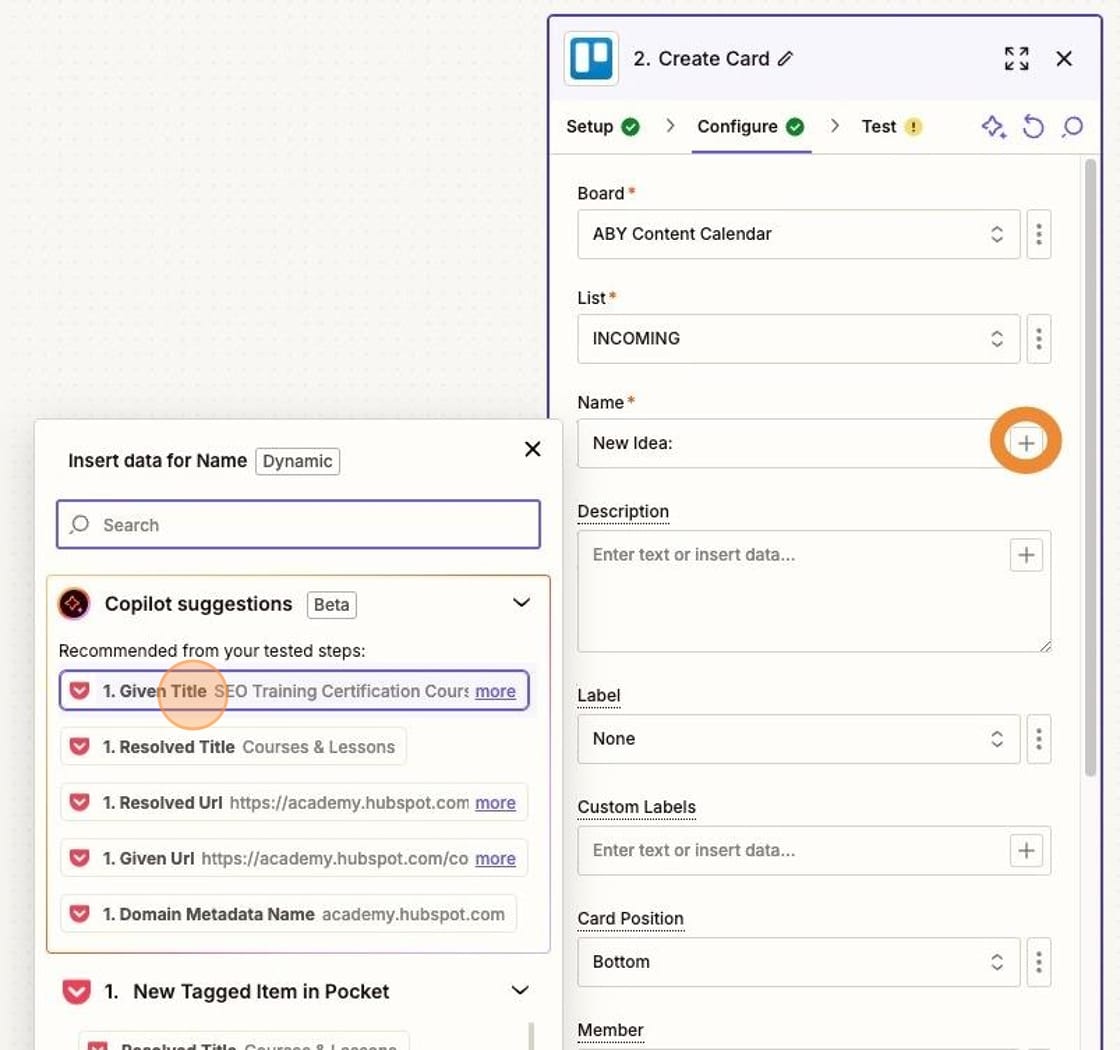
I like to start with the text "New Idea" followed by the title of the article.
To do this, I type "New Idea" into the Name field. Then I click on the (+) button at the end of that field. This allows me to insert data from the prior step.
Zapier will show me a list of fields coming from Pocket. I select the one that contains the title of my article.
Now, the Name of this card in Trello will be: "New Idea: {title of the article}"
Next, I add the URL of the article to the Description field in Trello. I follow the same process of clicking the (+) and selecting the URL field from the Pocket step.
By doing this, I can easily click back to the original article in Trello.
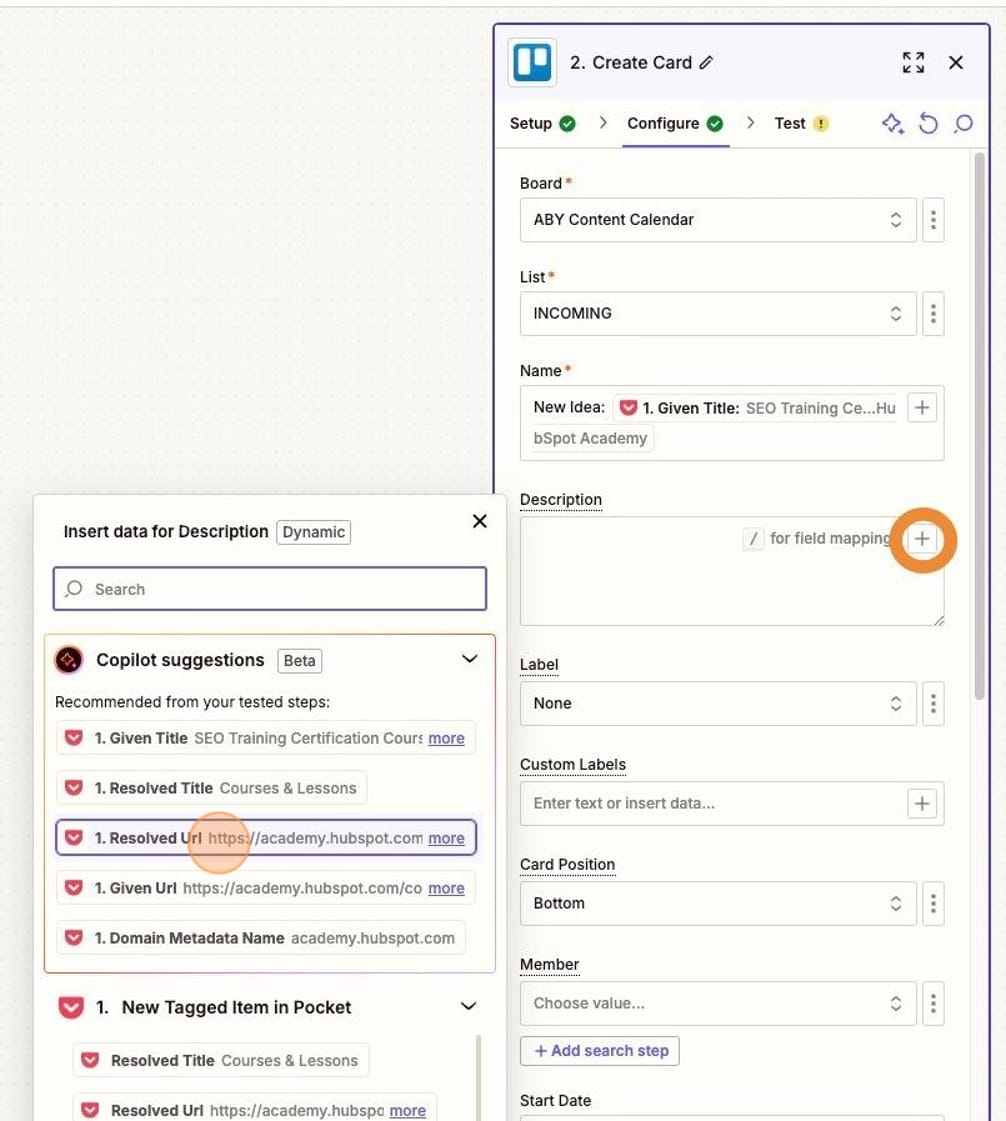
Note to Trello users: Trello also has a designated URL field that you could use for this step.
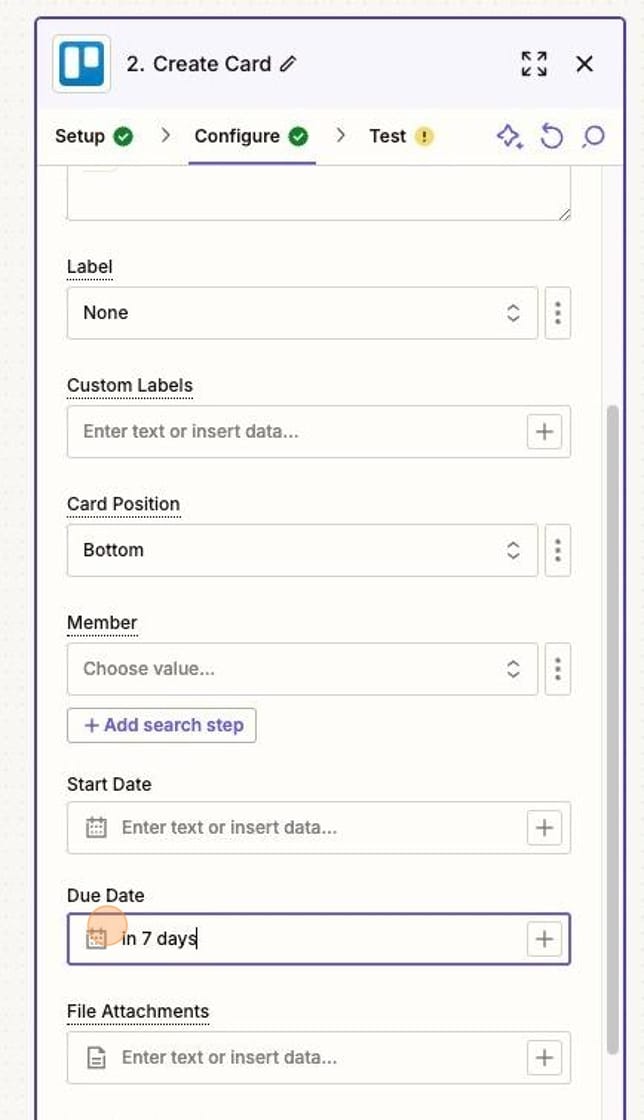
Trello has fields like Label that keep cards organized. If your content planning tool has something similar (like a "status" field), add those to your configuration.
I can also add a Due Date in Trello. By adding a due date (such as "in 7 days"), I make sure I review this new item within a week. But you could also leave any date field blank.
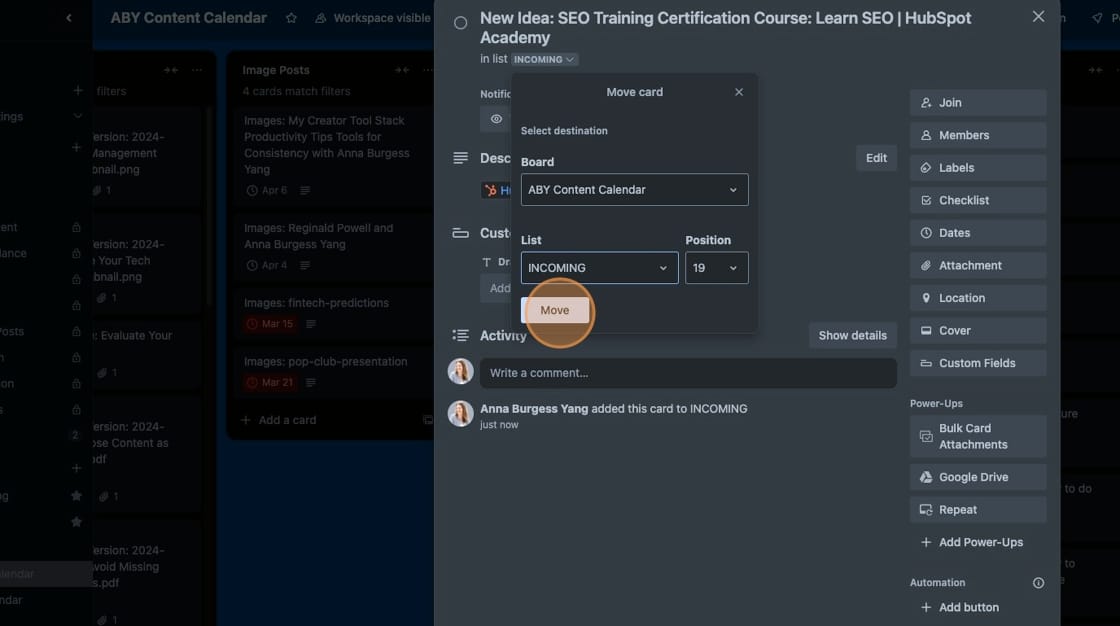
Step 4: Organize your saved content
Now, every time you add new content with that specific tag in Pocket, it will be added to your content planning tool, including any Due Dates, labels, and any other fields you set in Zapier.
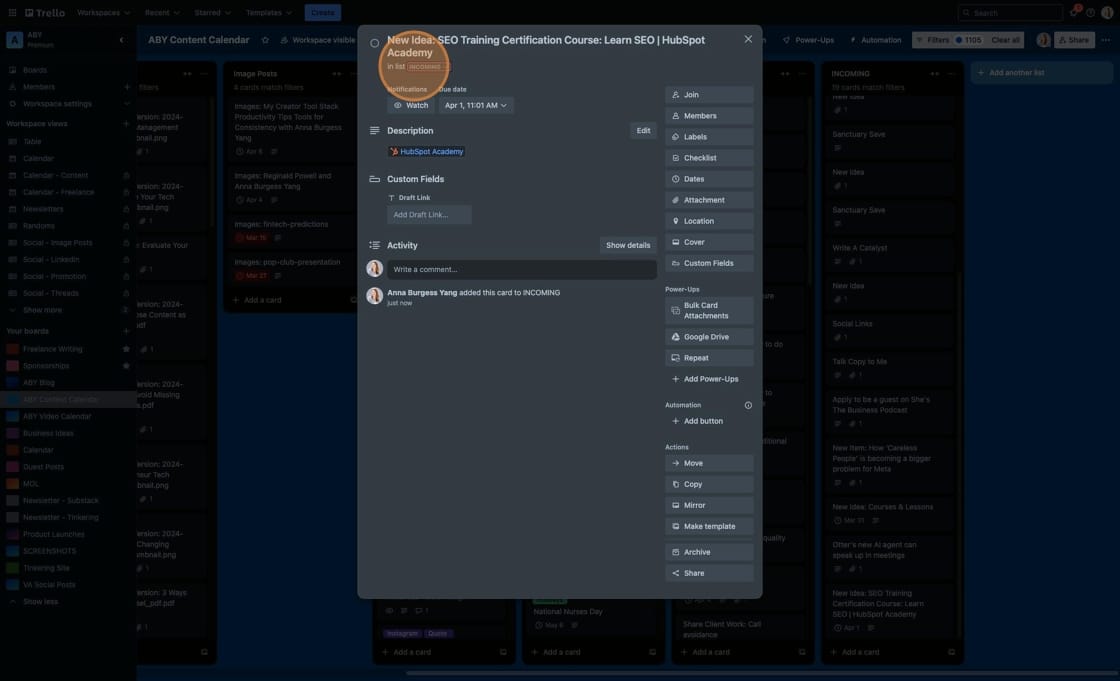
I don't leave these items on my Incoming list forever. Once a week, I go through them and move them to other Boards/Lists. For example, if I plan to write about the article in my blog, I would move it there.
Another way to approach this is to use different Tags in Pocket. For example, you might have a Tag called "Blog Idea" or "Social Media Idea." You can set up multiple Zaps that take different actions based on the Tag you choose.
I have some of this, but I like to keep my Tags as simple as possible. Therefore, I only use a single Tag with my content planning.
Additional resources:
- Want more ways to collect content ideas? Check out this free eCourse.
- Social Media for Solopreneurs: Tips and Tricks
- Dealing with rude people (online and elsewhere)

I created the screenshots in this tutorial using Scribe – it's one of my favorite tools. You can check out Scribe here [affiliate link].