Create Blog Post Teasers With a Field Agent in Airtable
Let Airtable create a first draft of your blog post teasers using AI.

I write a lot of content on the internet — across my blog, Substack, my other blog, and this tutorials website.
I have a ton of older posts that are still relevant and worth re-sharing. To do that, I need to write a teaser, and then add the teaser and URL to my social media scheduling platform (Buffer).
I've saved myself a few steps with an AI field agent in Airtable and automation through Zapier. With this workflow, I don't have to write new social copy every time I want to re-share a post, and I don't need to manually copy/paste information into Buffer.
Here's how it works.
Watch this tutorial on YouTube
Step 1: Create a view in Airtable for past posts
In Airtable [affiliate link*], I have a Content Library that tracks every blog post I’ve published.
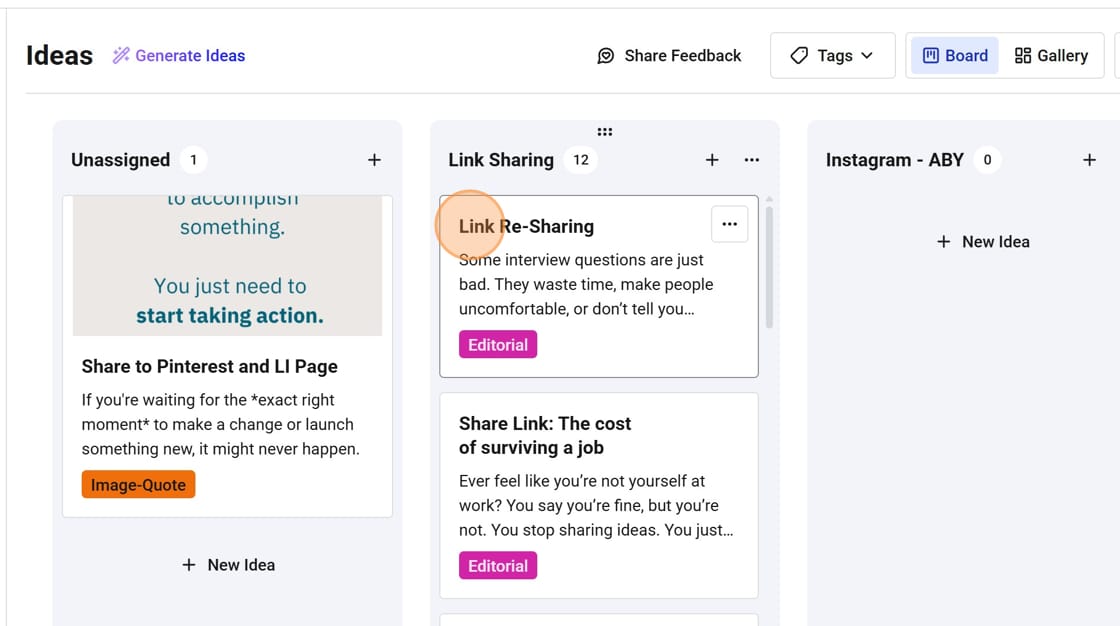
To make it easier to find posts I want to reshare, I created a view that filters for posts published during this week in prior years.
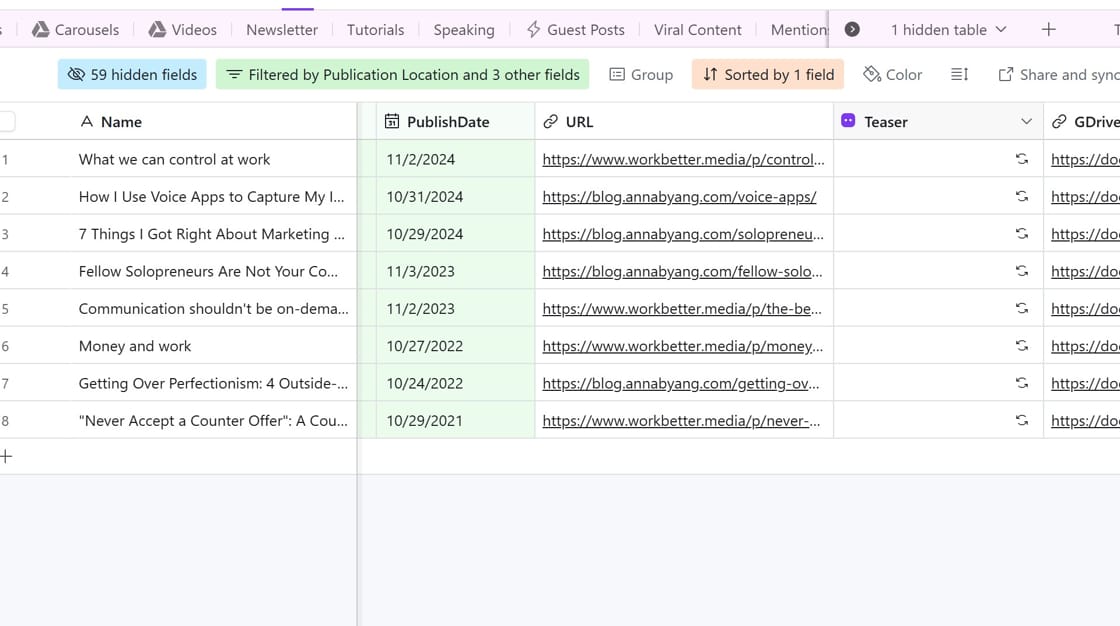
Every week, I review content from prior years and decide, "Is this worth re-sharing in some way?"
Step 2: Set Up an AI Field Agent in Airtable
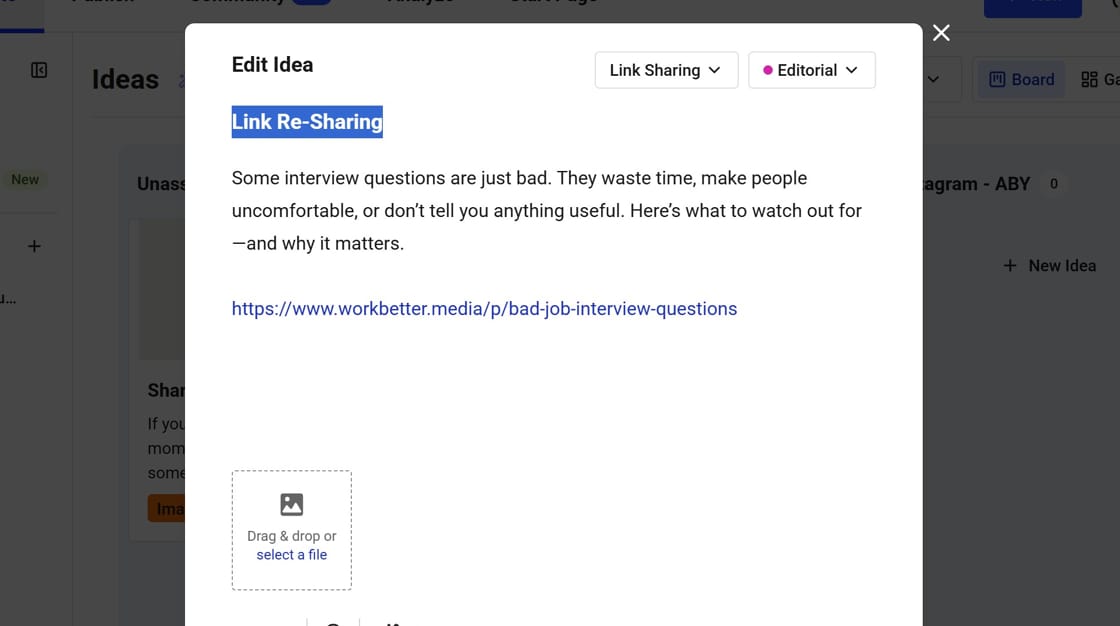
I have a field agent in Airtable that creates a teaser for the blog post, if I want to re-share it. You can check out step-by-step instructions to set up a field agent here.
For this field agent, I want a long text field.
I also need to insert the URL of the blog post, which is stored in Airtable.
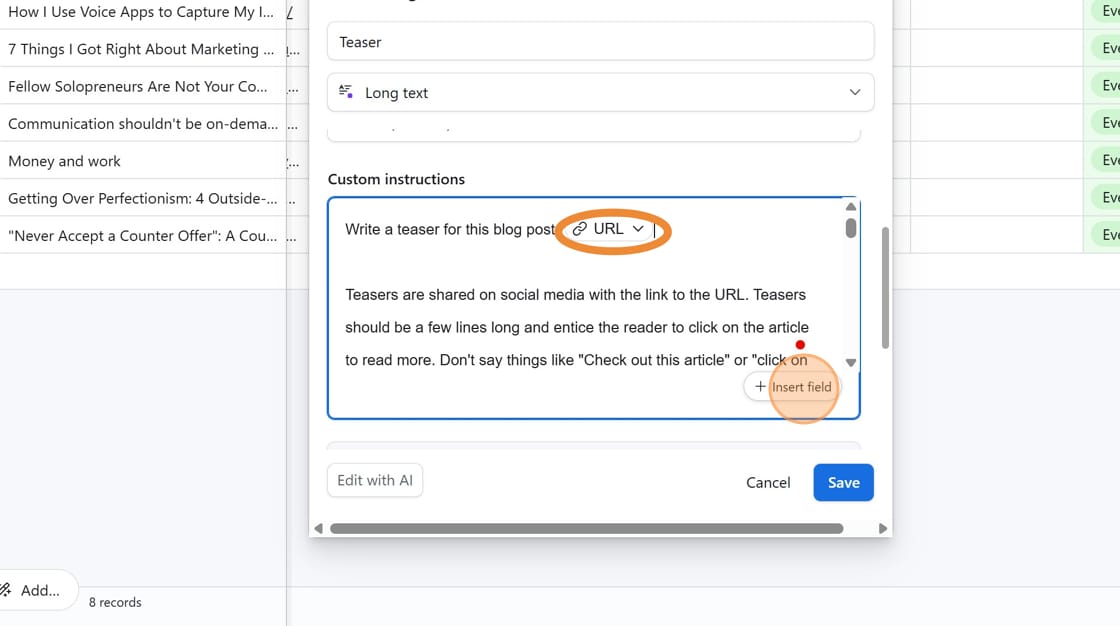
My custom instructions include:
Teasers are shared on social media with the link to the URL. Teasers should be a few lines long and entice the reader to click on the article to read more. Don't say things like "Check out this article" or "click on this link."
Then I have a lot of instructions about my voice and tone, and using simple, non-fluffy language.
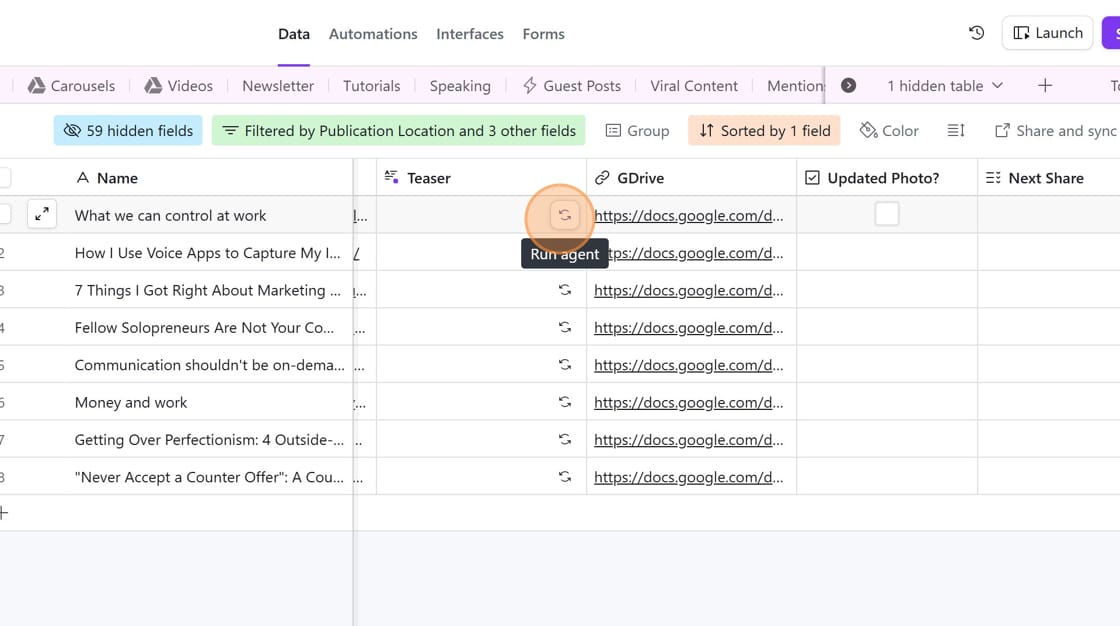
If I want to generate a teaser for a blog post, I click "Run Agent."
Step 3: Automate scheduling teasers with Buffer
Once I've created a teaser, I want it automatically sent to Buffer, which is where I schedule my social media posts.
The automation happens with Zapier [affiliate link*] and should work with any social media scheduling tool that has Zapier integration.
Trigger step in Zapier: New Record in Airtable
First, you'll select Airtable as your trigger in Zapier. You'll select Airtable as your app and "New Record" as your trigger.
I have a View created in Airtable of the links I want to re-share. Not everything I've written in prior years makes it to this list. It's filtered by a Status field I've created called "Link Re-Sharing" and must have a Teaser from my field agent.
In the trigger step, I've limited it to a View: "Evergreen - Link Share."
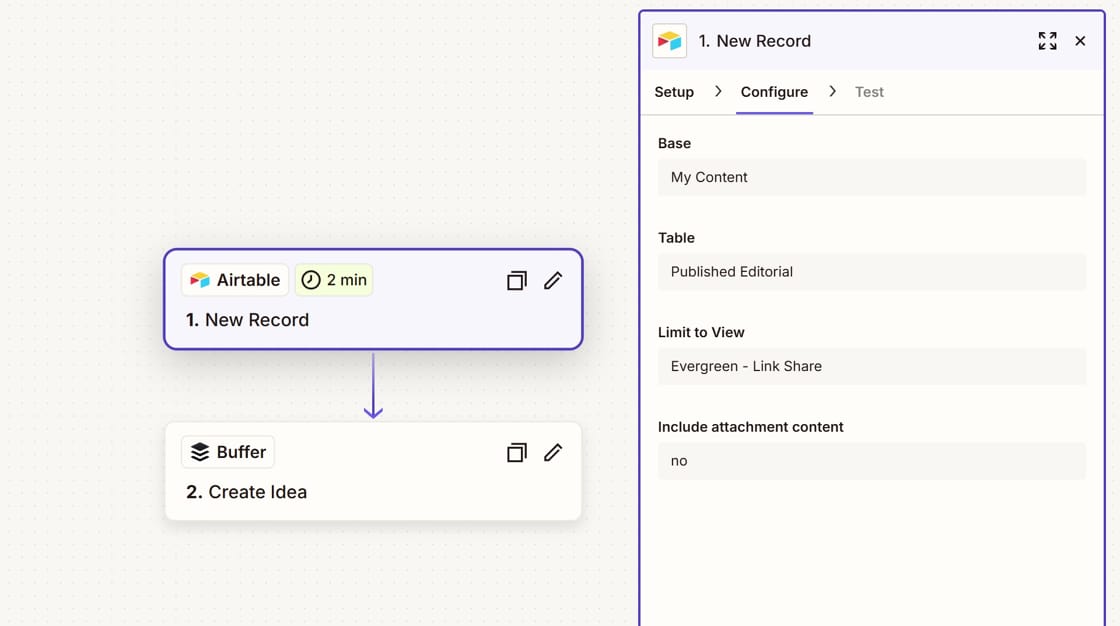
Action step in Zapier: Create Idea in Buffer
Next, my action step in Zapier uses Buffer as my app and "Create Idea" as my action.
If you're familiar with Buffer, the Create space is a place to store ideas. You could also send this directly to the queue for one of your social media profiles, but I prefer to send it to Create Idea first. That way, I can edit the teaser and choose which social media profiles I'm going to publish to.
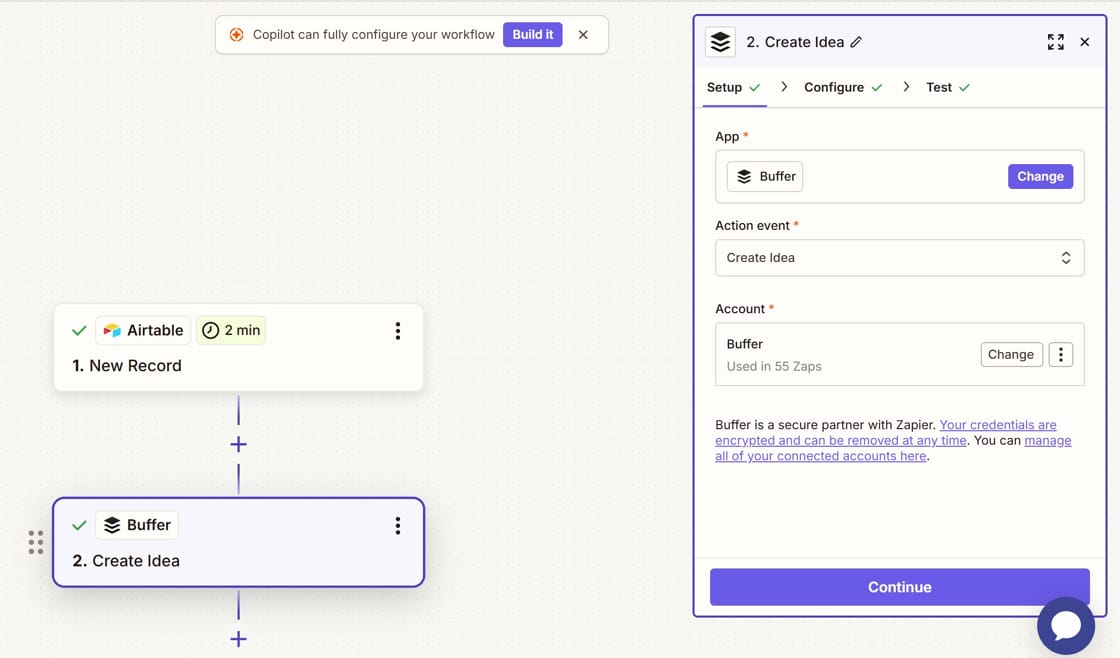
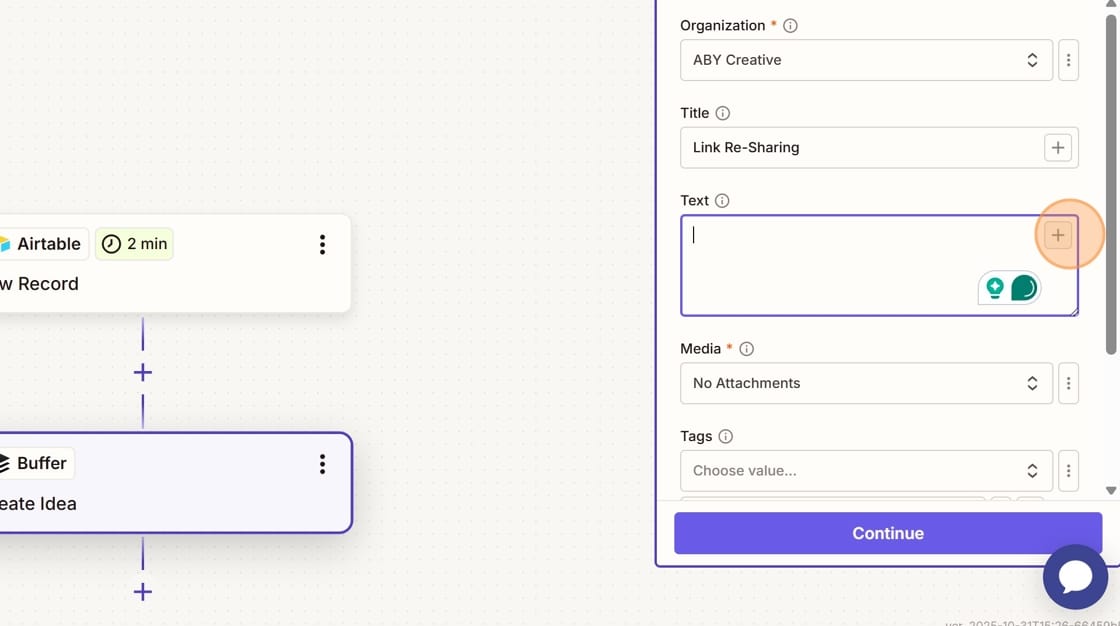
In the configuration, you'll give the Idea a Title (mine says "Link Re-Sharing").
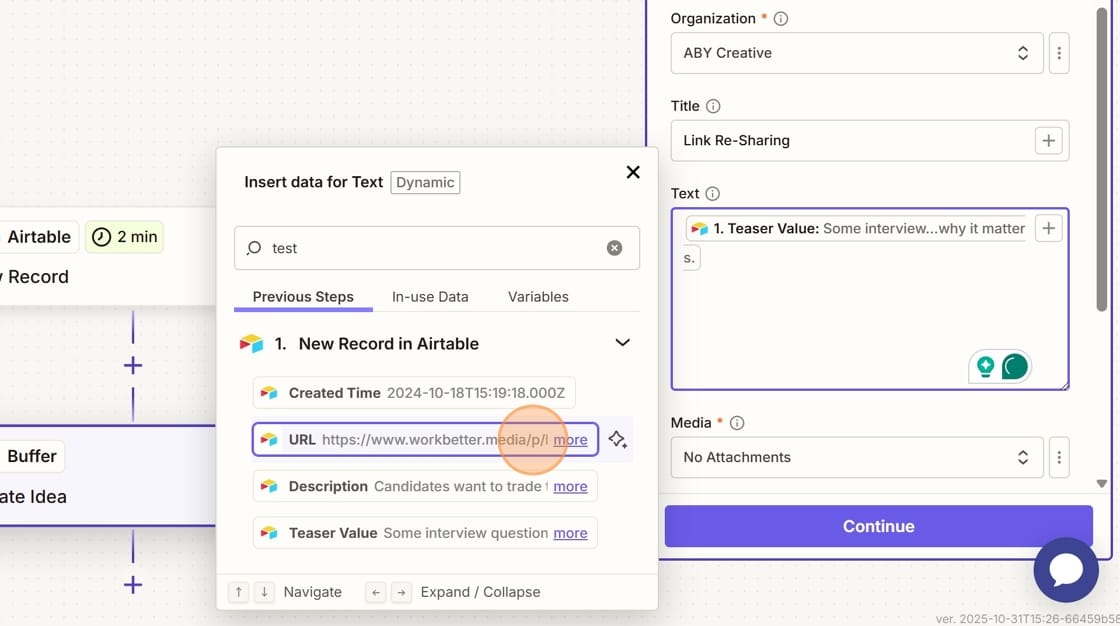
The Text is where you'll add the teaser and URL. Click on the (+) button.
From your Airtable step, you'll select the fields that contain your teaser and URL.
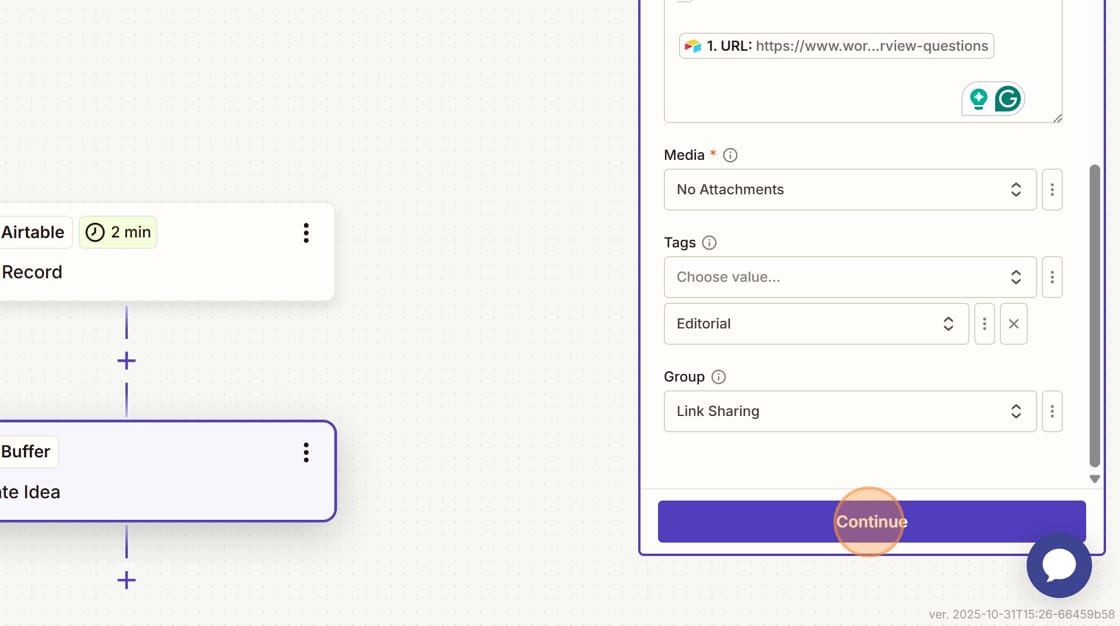
At the bottom, you'll add any Media, Tags, and Group in Buffer. Tags and a Group keep your content organized in the Create space.
Click "Continue" to test your Zap.
Step 4: Review and schedule in Buffer
When I'm ready to schedule the content, I review the teaser in Buffer.
This is what it looks like after it's sent from Zapier.
Going forward, Zapier automatically adds the teaser and URL to Buffer for me.
I'll edit the teaser that was generated by the Airtable field agent. The AI-generated teaser is a start, but I want it to sound like me and something I would write.
Why this system works
Sure, I could just write a teaser from scratch, since I still have to take the time to edit it. But editing a teaser written by the field agent is faster than writing one from scratch. Especially since its content I usually haven't looked at in more than a year.
Sure, I could just store one teaser in Airtable and use the same thing year after year. But that's also not my style.
This setup saves me time and gives my old content a chance to be rediscovered by new readers. "Why let content live only one life?" as I like to say. I put a lot of effort into writing it the first time. It deserves to be re-shared every chance I get.
More resources:
- Social Media for Solopreneurs: Tips and Tools
- Welcome to the Machine: Employees, AI, and Responsible Companies
Download my free resource for more tips.