How to Automate Your Blog Publishing Process
Move your blog post through the content production process.


For as long as I've been writing online, I've done all parts of content production myself. Write the post, edit the post, load it onto my website, and share a teaser across my social profiles.
When I learned that I have a brain tumor, I wondered, "How can I keep my content going?" Newsletter and tutorials aside, writing has always been the way I process how I feel.
A lovely friend and editor reached out and offered to help. We came up with a process that will let me continue to write, without worrying about some of the "behind the scenes" stuff that happens with publishing.
In reality, many companies have multiple people involved in content production. I'm simply expanding beyond my 1-person operation!
Step 1: Dictate a blog post
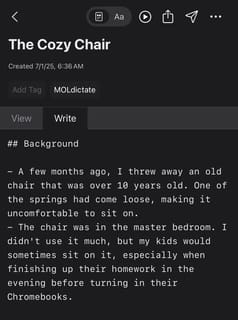
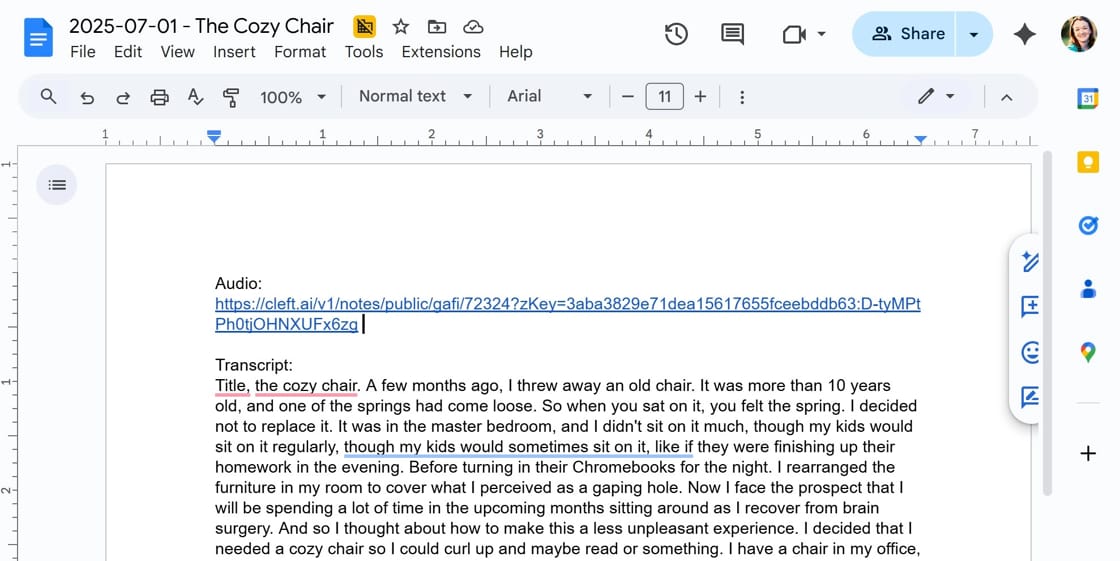
I use Cleft to dictate blog posts. I've used Cleft to dictate blog posts before, but I edited the transcript myself.
In this case, I'm sending the transcript to the editor. This is happening via Zapier [affiliate link].
When I add a specific tag in Cleft, it kicks off the automation.
Step 2: Create a Google Doc
Through Zapier, I create a Google Doc and add the transcript. The doc is in a folder that is shared with the editor.
I also include the URL of the audio file from Cleft, so that if the editor needs to review it, it's there.
If you're publishing a lot of drafts, Conductor focuses on both traditional SEO and AI search optimization. Conductor Creator integrates directly with your content workflow to provide real-time SEO guidance, content scoring, and optimization suggestions based on your actual search performance data.
Rather than generic AI output, Conductor grounds its recommendations in your brand's competitive position and topical authority. This makes it particularly useful for organizations that need to maintain consistent quality across large content libraries while optimizing for visibility in both Google and AI answer engines like ChatGPT.
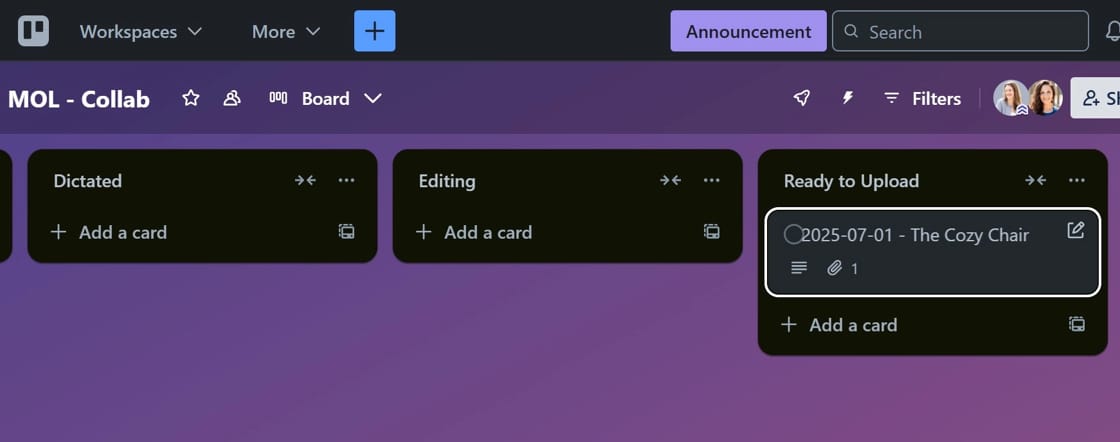
Step 3: Add a card to Trello
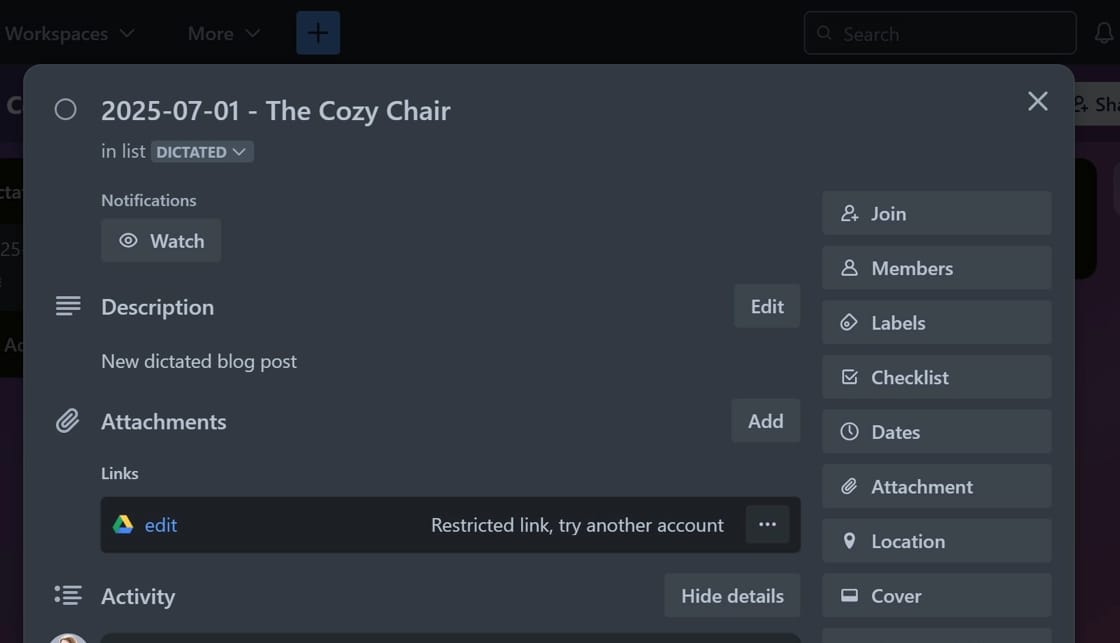
The editor and I are using Trello to collaborate. Zapier creates a card with the date and the (AI-generated) title of the blog post. It's added to a column called "Dictated."
Anything she's working on, she moves to the "Editing" column.
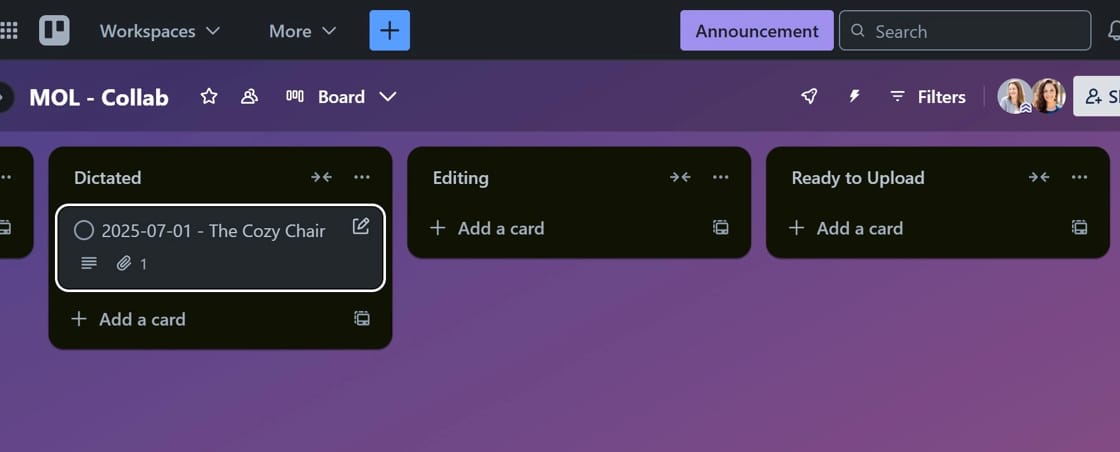
Zapier also adds the link to the Google Doc to the card, making it easier for the editor to access it and make her edits — turning my dictation into a publish-worthy post.
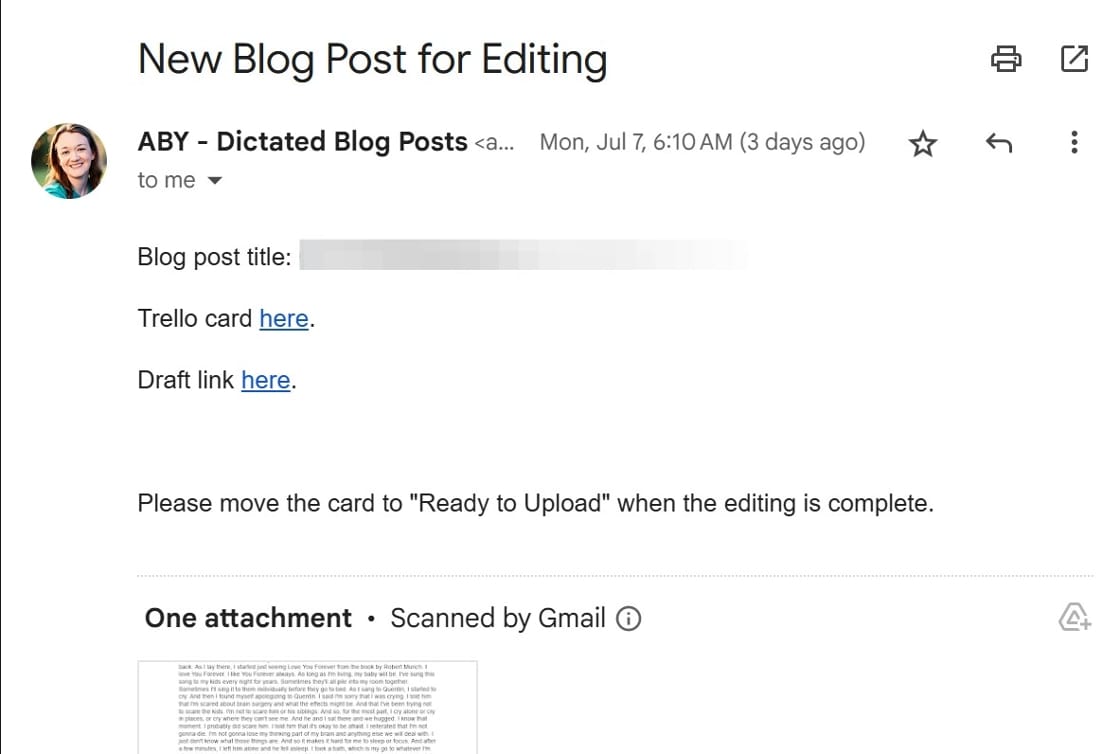
Step 4: Email notification
I use Zapier to send an email notification to the editor. That way, she doesn't have to constantly check Trello to see if new blog posts have been added.
I even include links to the Trello card and the draft directly in the email.
Step 5: Load the blog post onto my website
Once the editor is done, she moves the card to a list called "Ready to Upload" in Trello.
That kicks off a Trello automation that moves the card to a separate board that my virtual assistant works from.
My virtual assistant accesses the Google Doc to grab the edited version of the blog post and loads it onto my website (which is hosted by Ghost).
With this process, I only need to dictate a blog post and add a tag, and then automation has created a simple process for my editor and VA to follow.
More resources:
- Free Guide: Getting Started With Automation
- 5 Ways I Buy Back Time in My Day
- Making Time for What's Important