How to Set Up an Airtable Field Agent
And why you might use field agents.


A few weeks ago, I wrote about how I use Airtable for content. I specifically touched on AI, and how I hadn't found any use cases for AI in Airtable.
I take it back! The use cases I'd uncovered – like asking Airtable's AI assistant about my data or using it to build entire bases – weren't that interesting to me. But AI field agents are incredibly useful.
Field agents can automatically populate data into a field based on a prompt. Airtable had lots of ways to populate data before, but it was rigid. Like "If this thing happens, update this other field with a specific piece of data." Field agents have a lot more flexibility.
I'm using field agents to automatically select categories for my data. Full disclosure: I was doing this through Zapier before (with ChatGPT). But now, I think it makes more sense to do it directly in Airtable.
Here's how it works and why you might want a field agent in Airtable [affiliate link].
Step 1: Add a new field to your table
First, you'll create a new field by clicking on the (+) button.
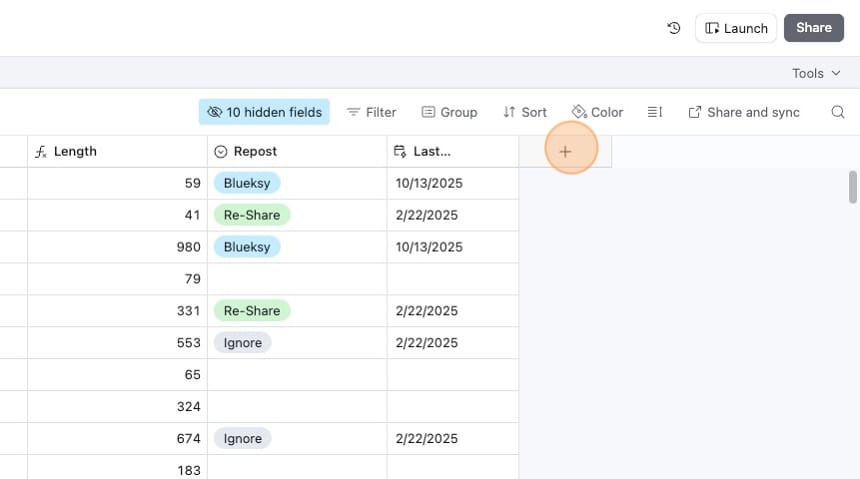
From the field types, select "Build a field agent."
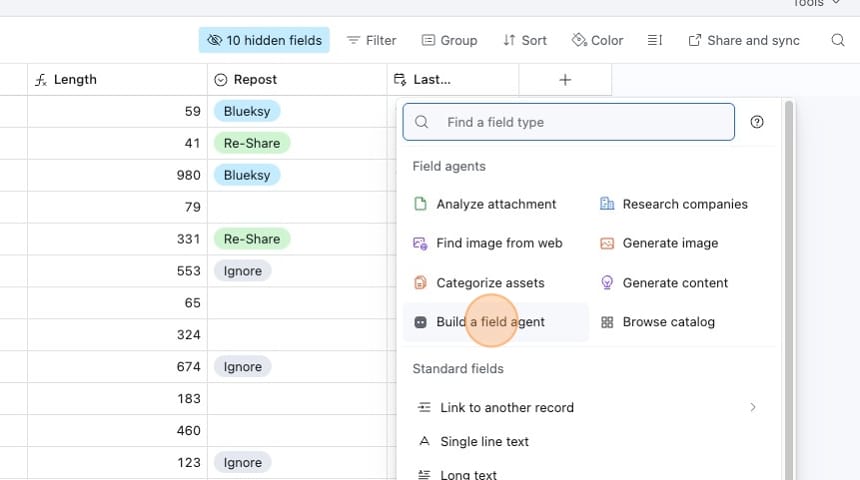
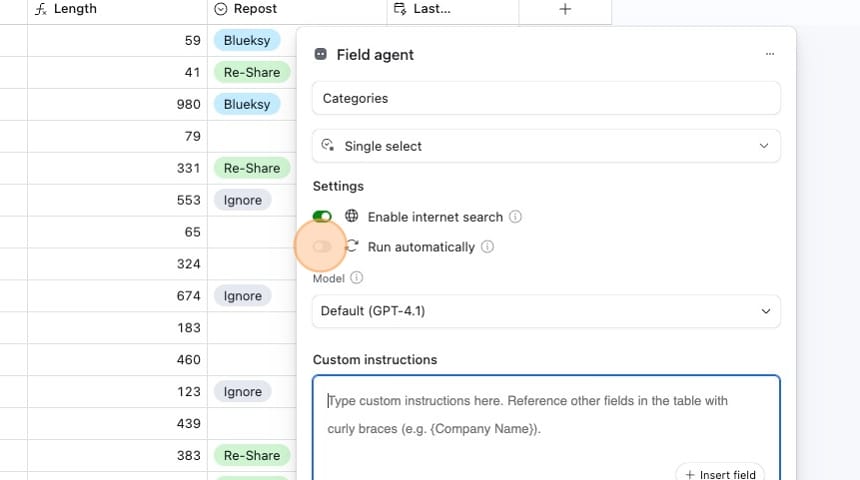
Step 2: Configure your field agent
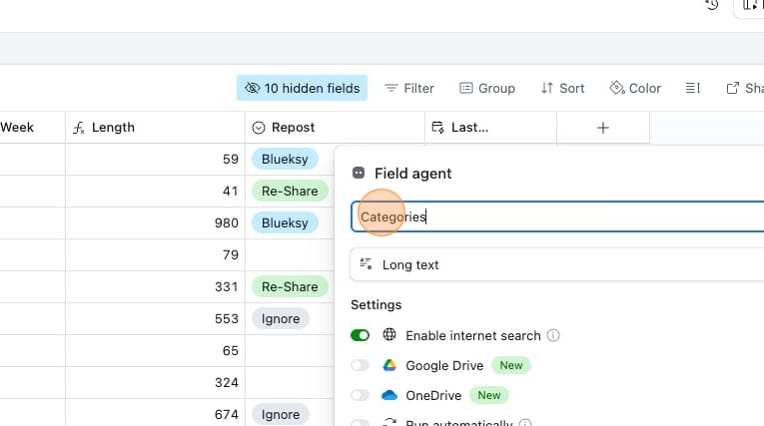
You'll give your field a name, just like you would any other field in Airtable.
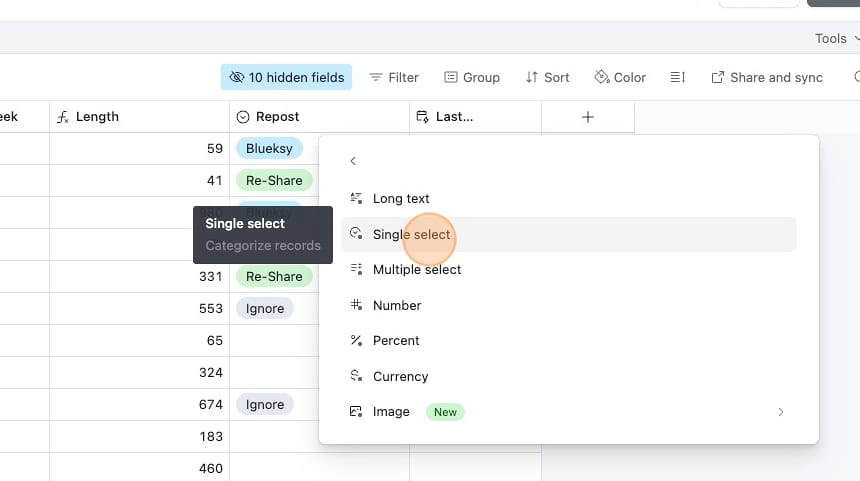
Next, you'll select a Field Type. For this example, I'm going to categorize my data based on another field in Airtable. I'll use a "Single Select" field type.
For context, this is a table that contains a bunch of my previously published LinkedIn posts. I want to re-publish some of the posts on other platforms (like Threads or Bluesky) – but only if the original post is about certain topics. To find those, I need to categorize the posts.
You'll have some additional settings, such as "Enable Internet Search" and "Run Automatically." I turned both of these on.
You can also select the Model to use, and I left it at the Default.
Step 3: Add your instructions
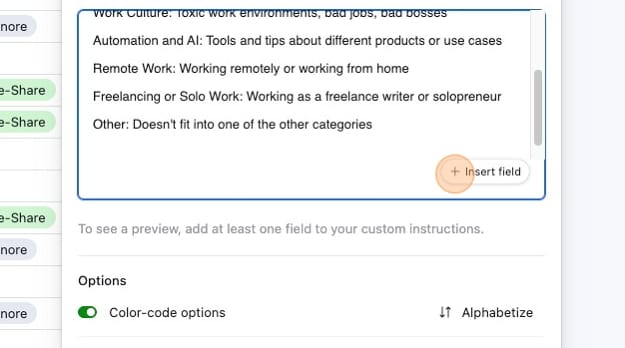
Next, you'll type your instructions for the field agent, much like you would use in ChatGPT. If you're looking to categorize data with a field agent, here's the prompt I used:
Categorize the following text into one of the defined categories below. Only return a single option.
Here's a brief description of how they should be categorized:
Work Culture: Toxic work environments, bad jobs, bad bosses
Automation and AI: Tools and tips about different products or use cases
Remote Work: Working remotely or working from home
Freelancing or Solo Work: Working as a freelance writer or solopreneur
Other: Doesn't fit into one of the other categories
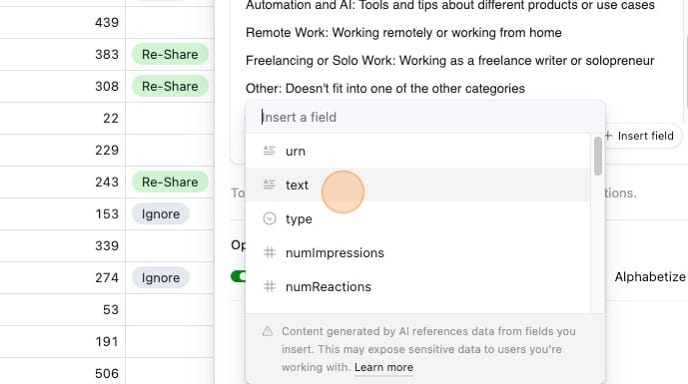
After my prompt, I clicked the "Insert Field" button.
I inserted data from the same table. The "text" field is my original LinkedIn post. That way, the field agent knows what data it is categorizing.
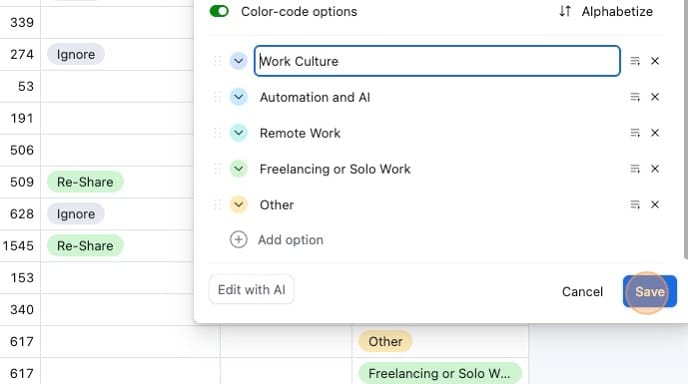
Step 4: Add your single-select options
Since my field type is "Single select," I had to add my single select options. These match the instructions I used in my prompt.
Like any single-select field in Airtable, you can color code the options and change the order in which they are listed.
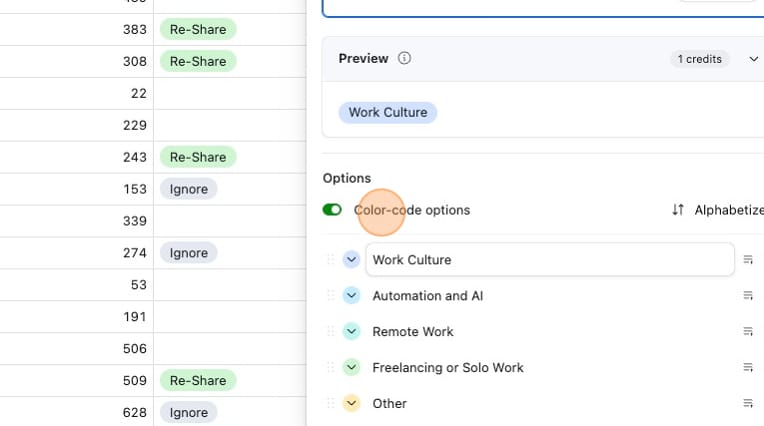
Once you're done, click the "Save" button at the bottom.
Step 5: Let the field agent run
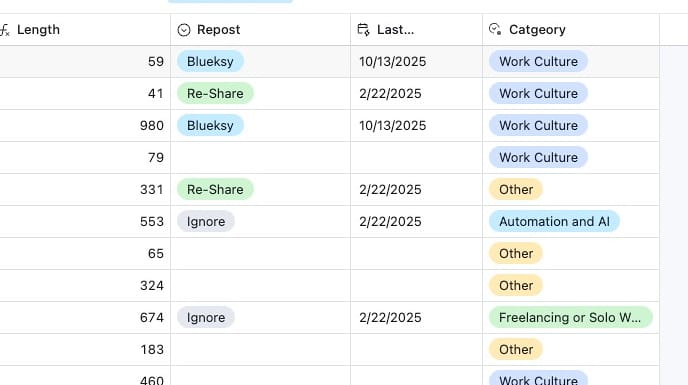
If checked, your field agent will run automatically. This table had thousands of records, so it took a few minutes to populate the data the first time. Going forward, any new records will have the category automatically added.
I can still make changes. If the Category assigned wasn't correct, I can change it by selecting one of the other options.
I should note that using Airtable AI is based on a credits system that I don't fully understand. Airtable's pricing page isn't clear either, other than that different actions take different credits.
I'm on a team plan of Airtable with two users (myself and my virtual assistant). I have 30,000 AI credits per month. Setting up this field and testing it a few times used up 4,667 credits.
I expect that setting up a field and retroactively categorizing a bunch of data could burn through a lot of credits. But running a field agent on new records might not be too bad, depending on how you use Airtable.
I should add that the AI credits are included in my Airtable plan. I'm not paying extra for them.

More resources:
- How Has Your Relationship With Work Changed?
- Preserve Your Content Energy: Let Tools and Automation Do the Grunt Work
Download my free resource for more tips.