Send Email Reminders With Airtable Automations
How to get data from Airtable to your inbox.


I use Airtable a lot. It's my content library, where I keep track of everything I've published on The Internet. It's also my central hub for everything related to my freelance business: clients, projects, payment, and more.
I use Todoist to keep track of my to-do items, but sometimes the things I need to do are in Airtable. For example: I typically send invoices twice a month (on the 5th and the 20th). I can have a to-do item for sending invoices, but the specific invoices and payment amounts are in Airtable.
Airtable is also where I keep track of my sales pipeline. I could set myself a reminder to update my pipeline once a week, but I like to get an email with a list of which deals I'm working on. It's more motivating to see the specific data than just a generic reminder to "update the pipeline."
I have automation set up within Airtable [affiliate link] to send myself email reminders with Airtable data contained in the body of the email.
Here's how it works.
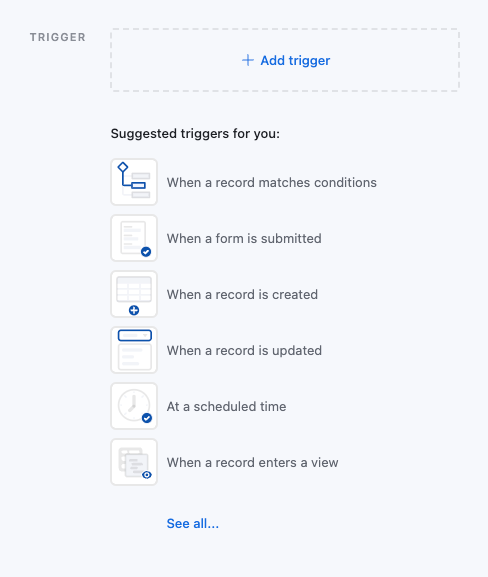
Step 1: Set up your trigger in Airtable automations
In the Airtable automations area for your base, you'll select Create new → Create automation.
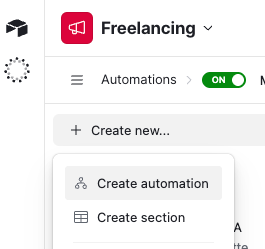
You'll need to first select a trigger. Airtable will suggest a lot of triggers for you.
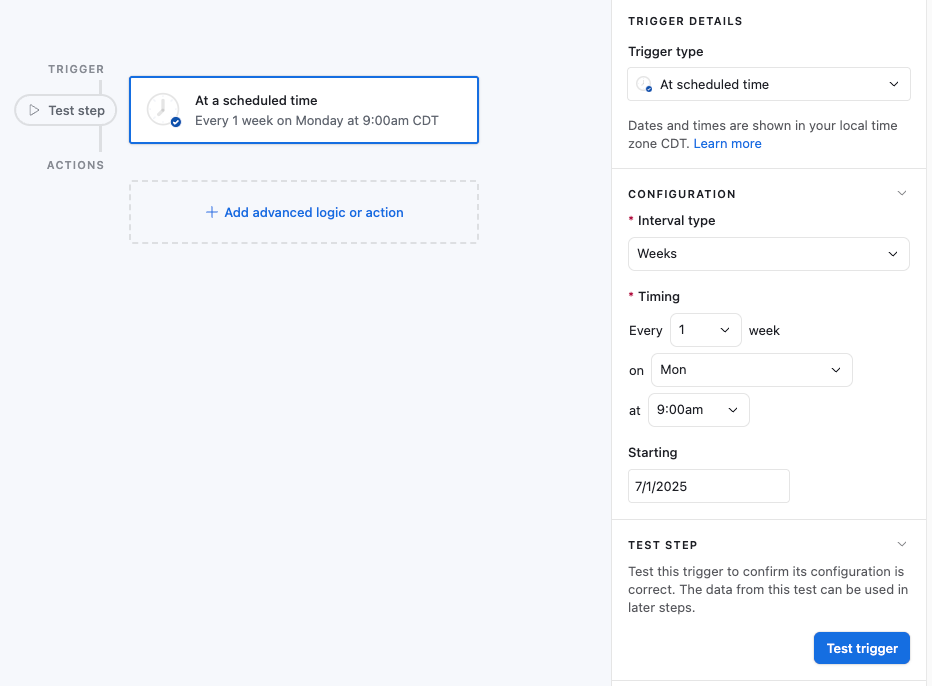
Because I want emails to arrive at a specific day and time, I select "At a scheduled time." But I also have email automation set up based on "When a record enters a view" (and I need to take action immediately, so I need to know about it).
You'll need to configure your trigger. In this example with "At a scheduled time" I have to select an Interval type (weeks) and Timing (every 1 week at 9:00 am).
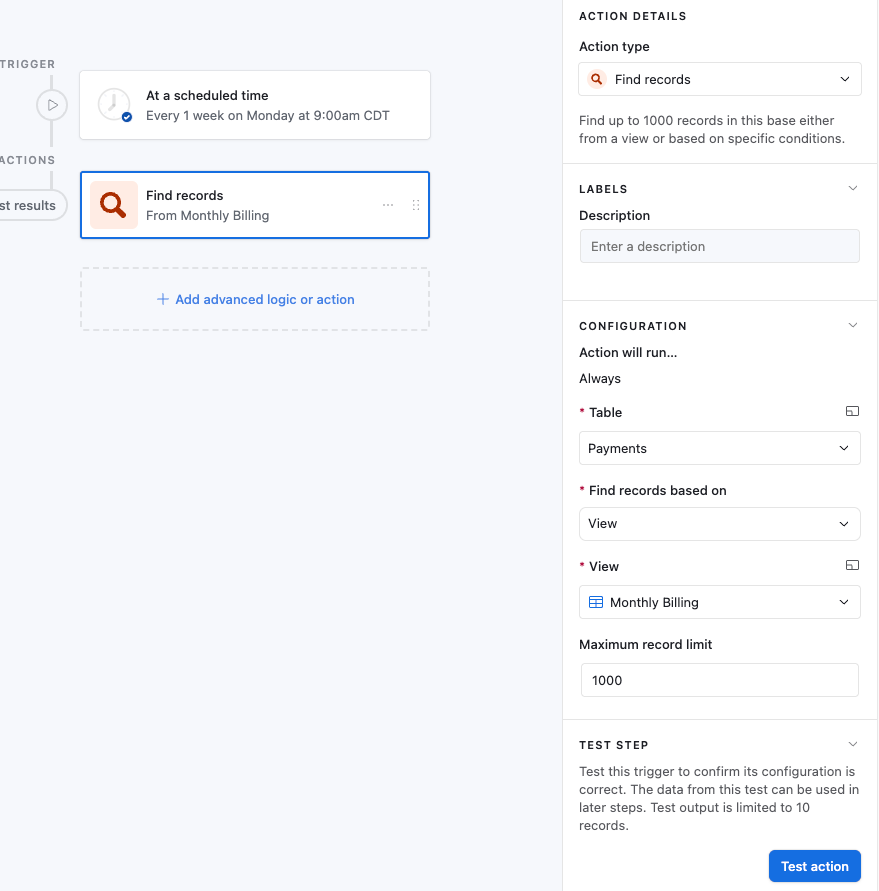
Step 2: Add logic
Next, you'll let Airtable know which records to find.
In my example with emailing myself a list of invoices to send, I use "Find records." Then I configure the Find to look for records within a specific View in a specific Table.
The View is filtered to display records that need an invoice sent. By limiting my Find to that View, I know I'm getting the right list.
Step 3: Send an email
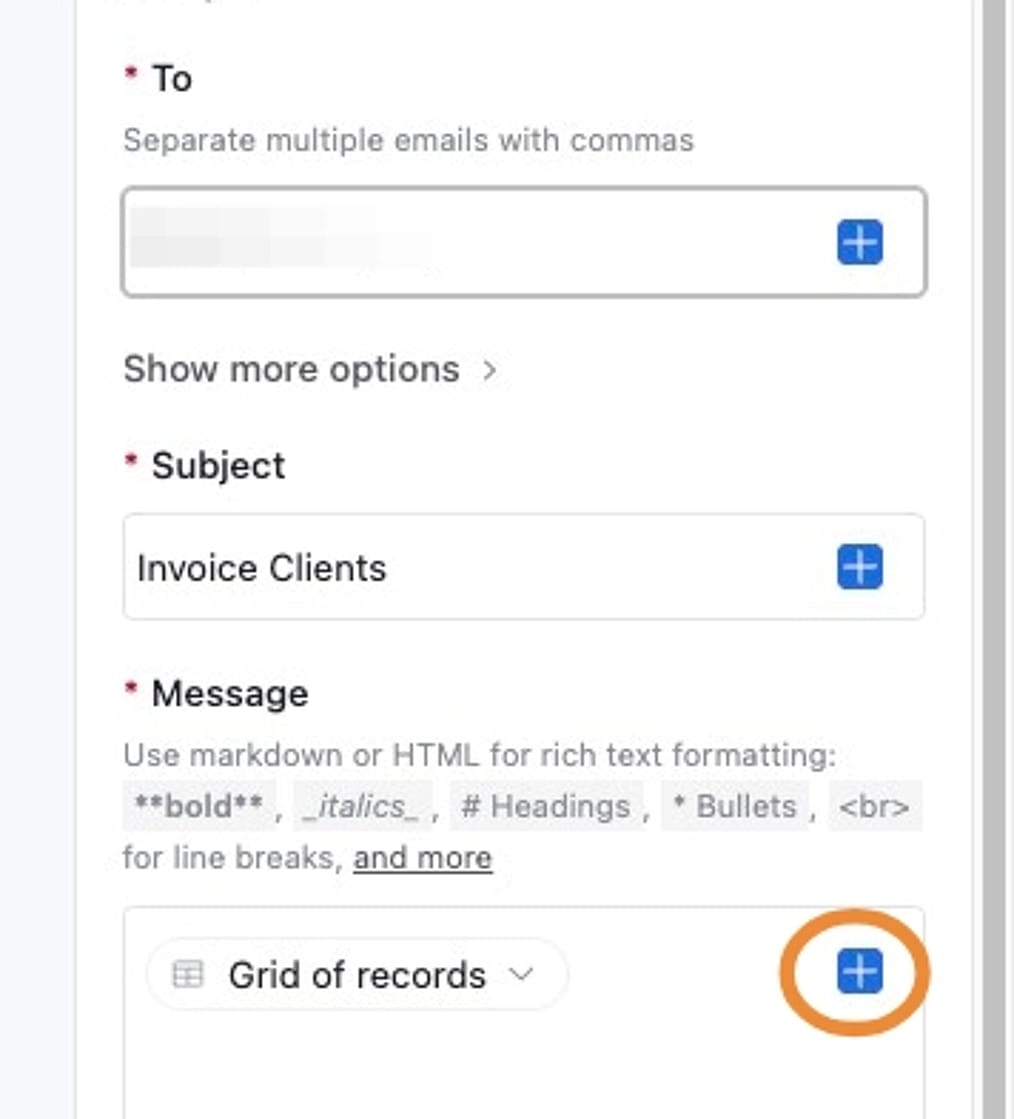
In your last step, you'll configure an email to send to yourself.
Select the "Send an email" action.
Enter your email address in the "To" field and add a Subject line.
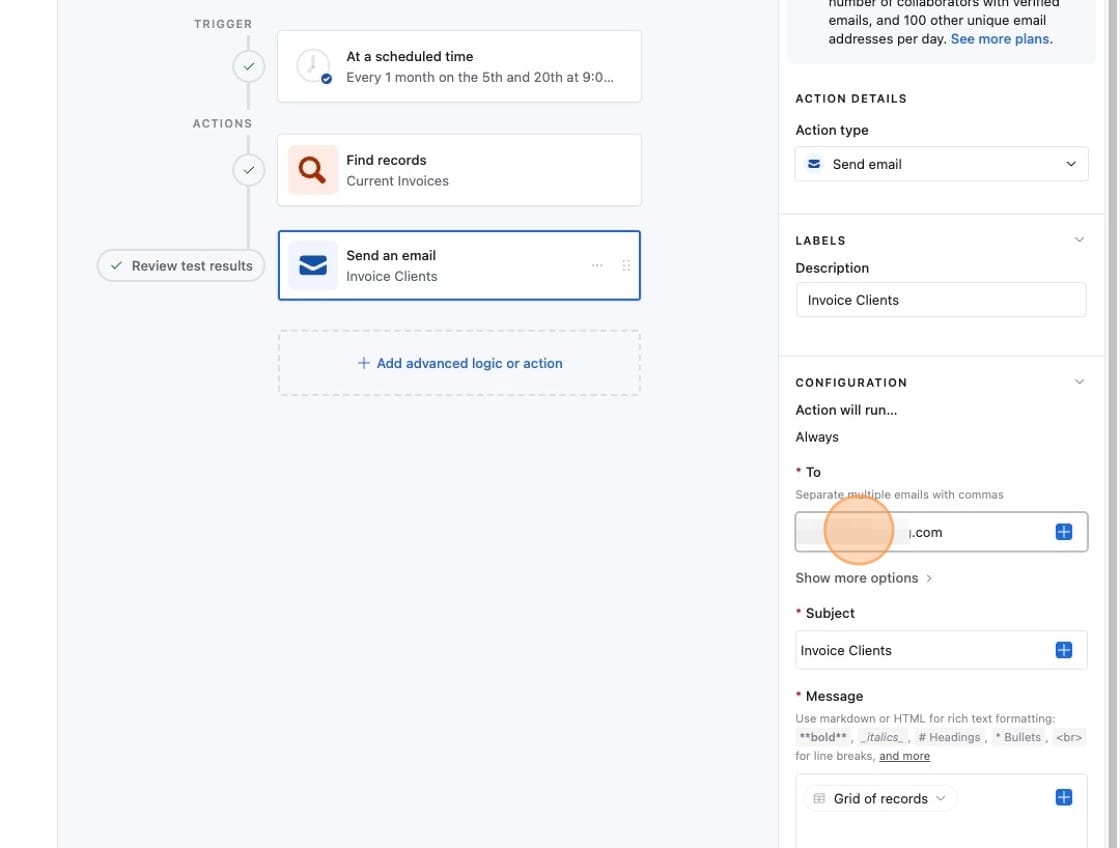
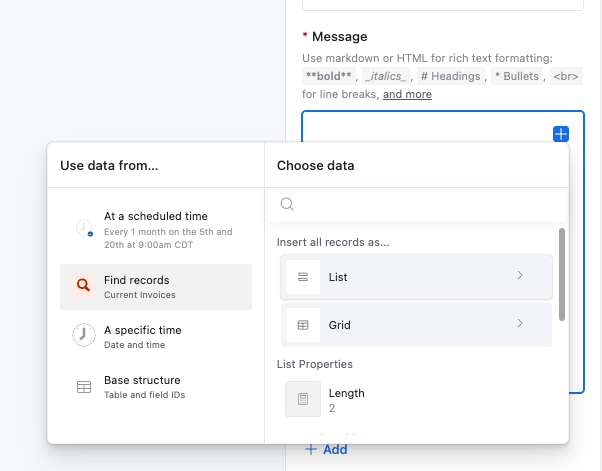
Next, you'll want to add a Grid of records in the Message field. Click the (+) to add a Grid of records.
You'll select data from the Find records step. From the "Choose data" selection, choose "Grid."
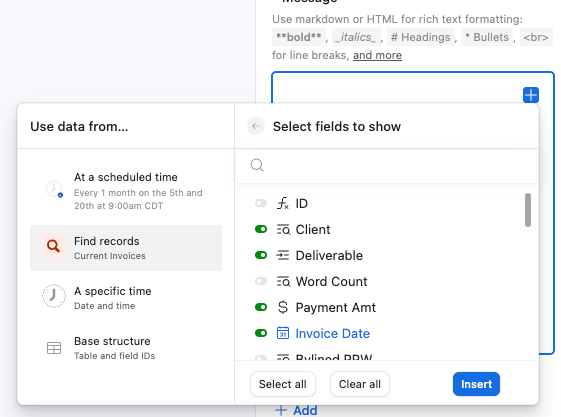
Next, you'll select the fields you want to display in your grid.
When this automation runs, the body of my email looks like this: a nice grid of clients, deliverables, payment amounts, and invoice dates.
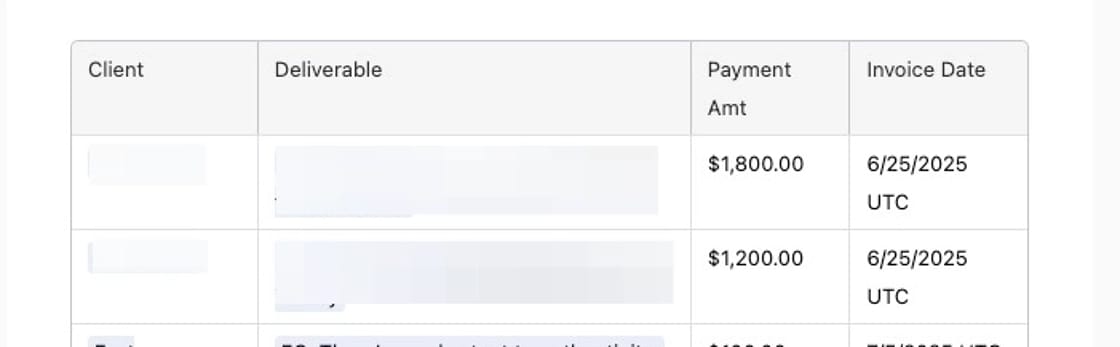
Once I receive this email, I can go directly into QuickBooks and work from this list.
More resources:
- Free Guide: How to Create a Content Library... and Why You Need One! (in Airtable!)
- Invoicing for Freelancers: What You Need to Know
- Making Time for What's Important