How to Add AI by Zapier to Your Workflows
Keep your use of AI in Zapier flexible.


I've been adding AI into my Zapier workflows for a while. It started with ChatGPT.
But recently, I've switched AI models, and now I rely on a combination of Claude and Gemini. Now I was faced with a disconnect: Claude and Gemini for everyday use; ChatGPT in Zapier. It made sense to update Zapier [affiliate link*] to match.
We're talking dozens of affected Zaps. I could change the connected apps in Zapier. It would mean copying the prompts out of the ChatGPT connected app and pasting it into the new connected app (Gemini or Claude). But I thought: what if I want to change models again in the future? I'll have to go through this process all over again.
Instead, I changed the connected app to AI by Zapier. Within this app, you pick a particular model. If I want to make a change, I only need to select a new model. I won't need to set up the entire step again.
Here's how to set up AI by Zapier.
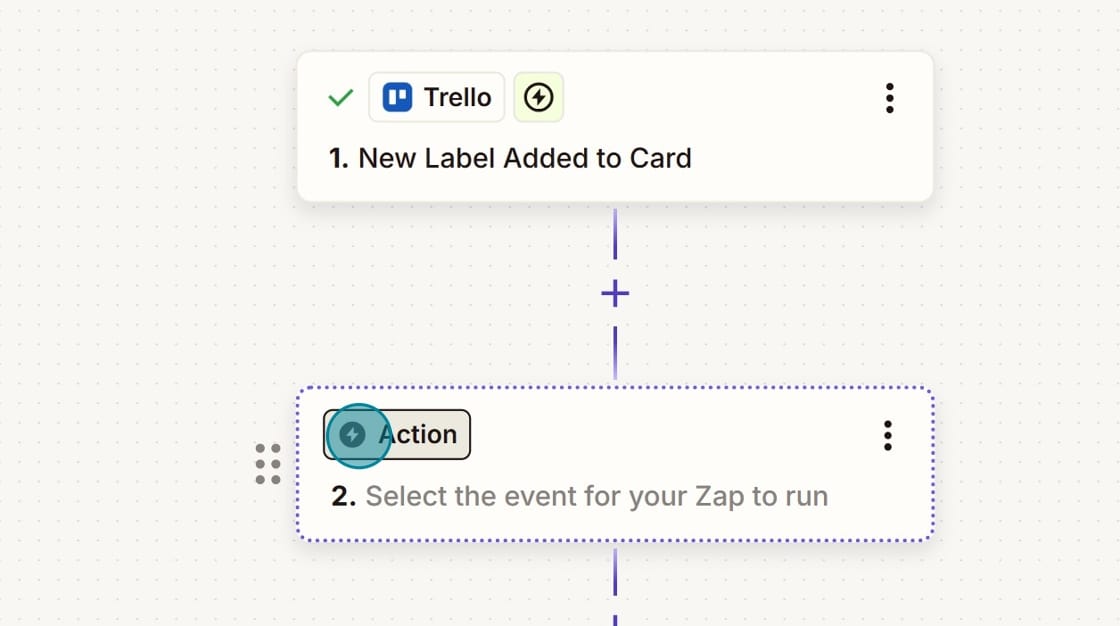
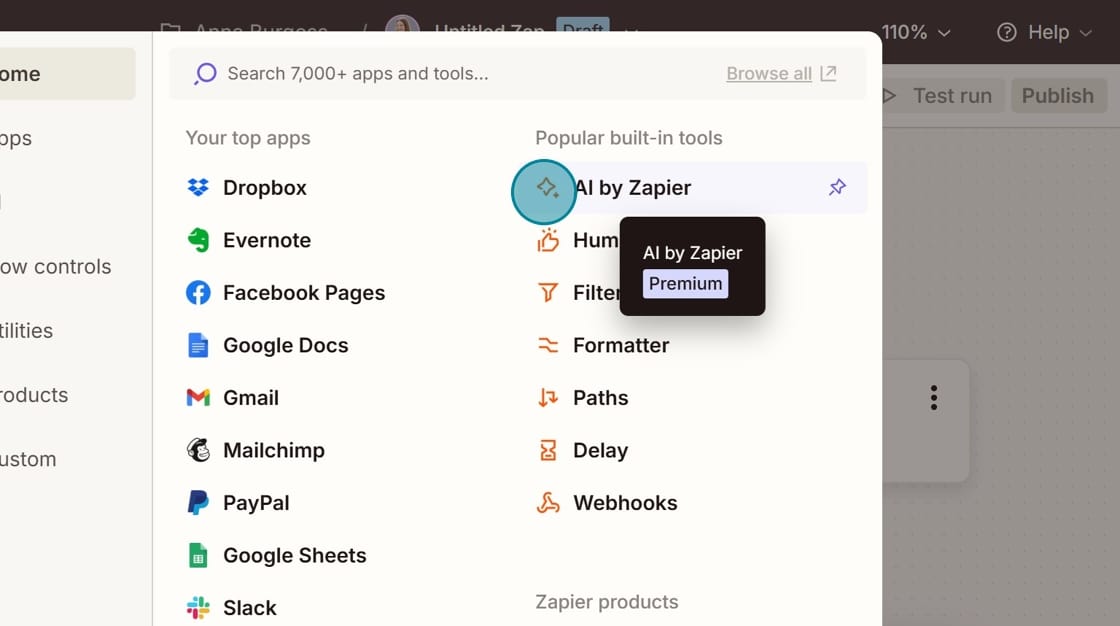
Step 1: Select AI by Zapier
The use cases for this are hugely varied. In this example, I am writing a blog post and planning my content in Trello. When I add a particular label to a card, I want AI by Zapier to generate some talking points for me on the topic.
I select AI by Zapier as my Action step.
AI by Zapier is a Premium action, so it's not available on all plans.
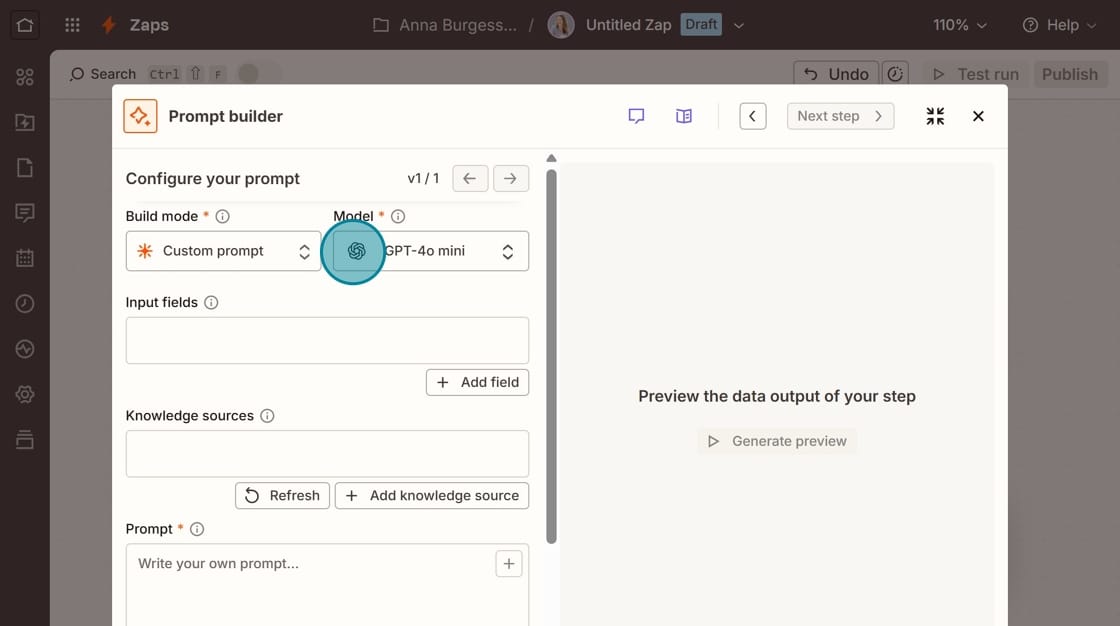
Step 2: Select your model
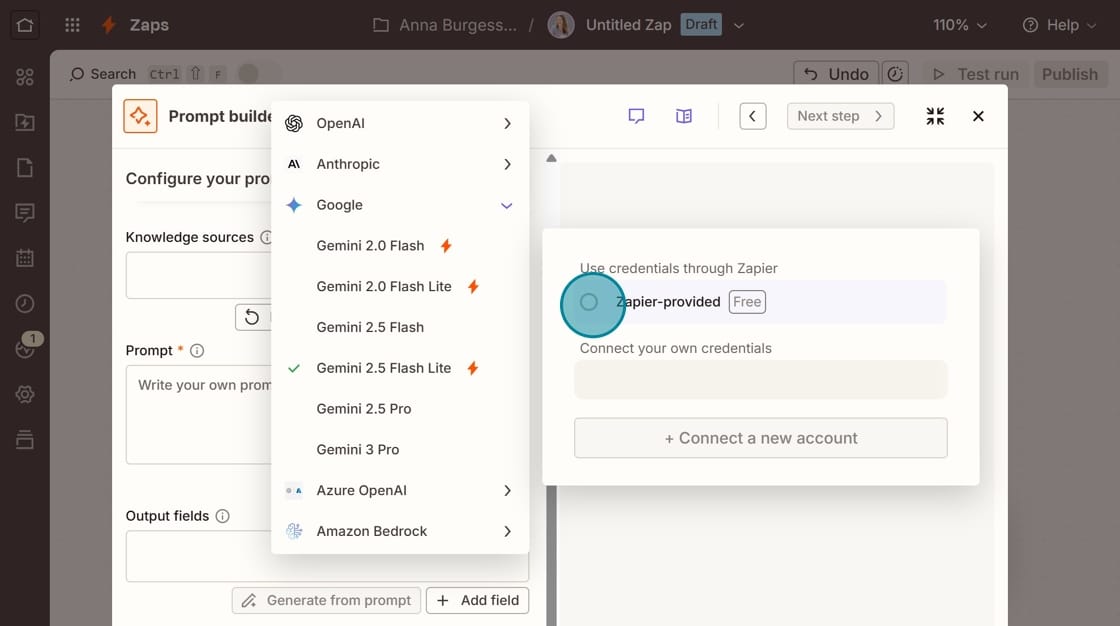
In the Prompt Builder, you'll select the particular model you want to use.
This is where AI by Zapier makes more sense than picking an app directly. If I want to make a change, I'd only need to come in here and change the model. Everything else would stay the same.
The models with the lightning bolt icon are provided by Zapier for free. If you'd like to use a different model, you'd have to connect the model's API (and then you'd be paying for API usage).
This depends a lot on what you're trying to do. For my purposes, the free models are fine.
Step 2: Create an input field
Input fields add data to your prompt from previous steps.
In this example, my Trello card has my blog post topic. I need to pull that topic into my prompt in order for my output to be correct.
First, you'll add a Field name. I always name the card App_FieldName. So in this case, it is Trello_CardName.
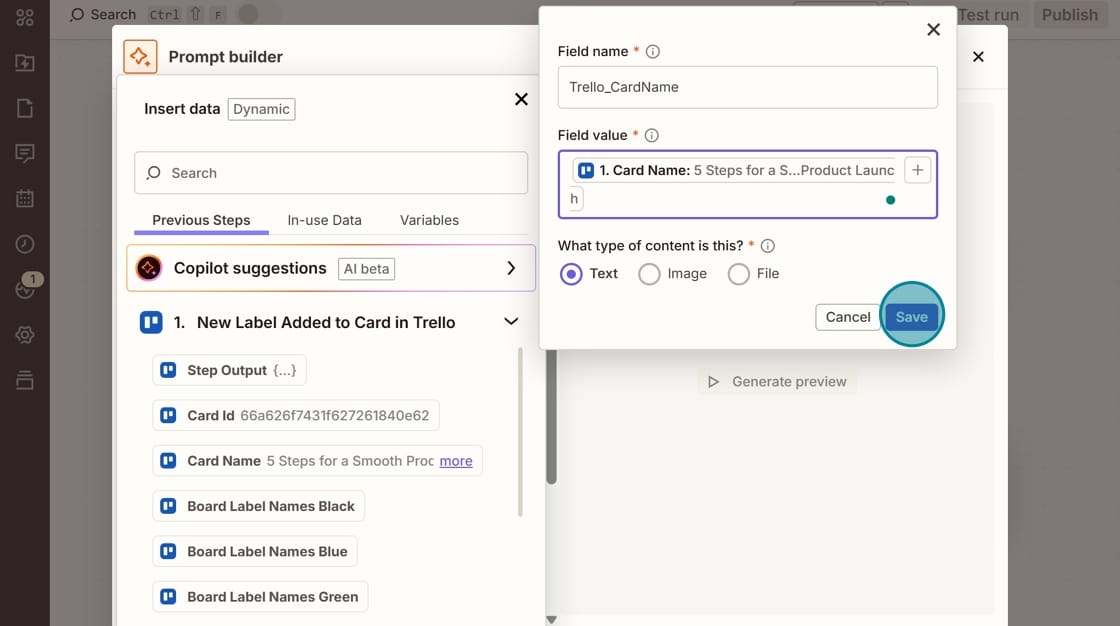
Next, you'll add a Field value and this is where you pull in data from your previous step.
Click the (+) in Field value and then select the field from your prior step. I click on the Card Name field from Trello.
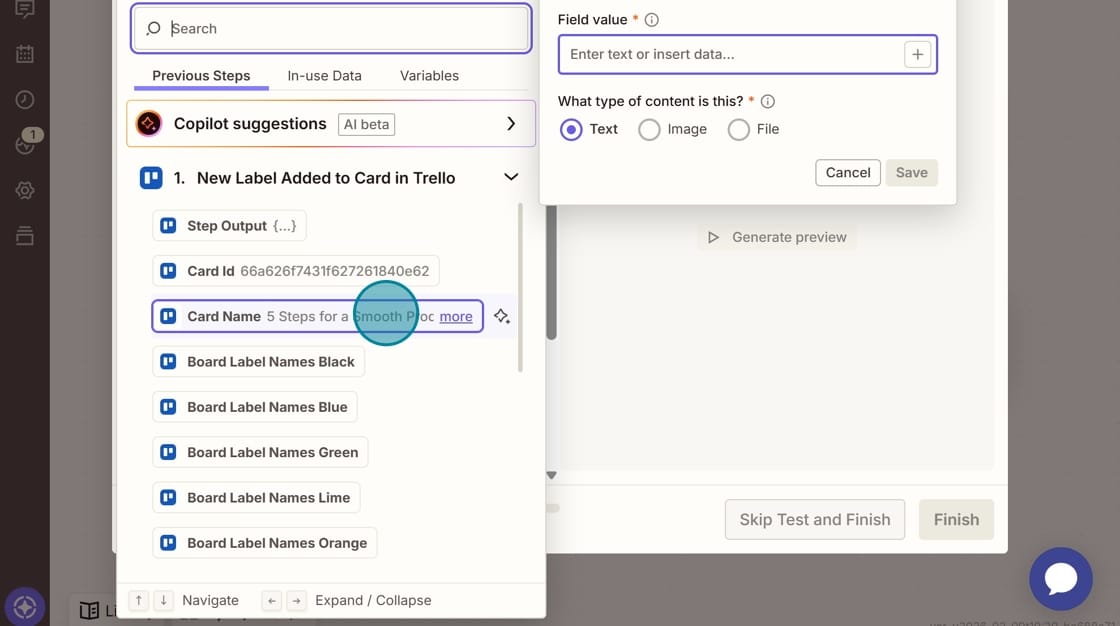
You can add multiple input fields, so if you need data from multiple prior steps, you can do that.
Step 3: Add knowledge sources
Knowledge sources give your prompt context. You can add Knowledge Sources from apps like Google Drive, Dropbox, and Notion. You can also upload Knowledge Sources from your computer.
For example, here I attached a Google Doc of my Voice and Tone Guide for my blog to give AI by Zapier context about my writing and audience.
You'll click on Add knowledge source and then select your source (Google Docs in this case). You'll search for the file and then select "Create."
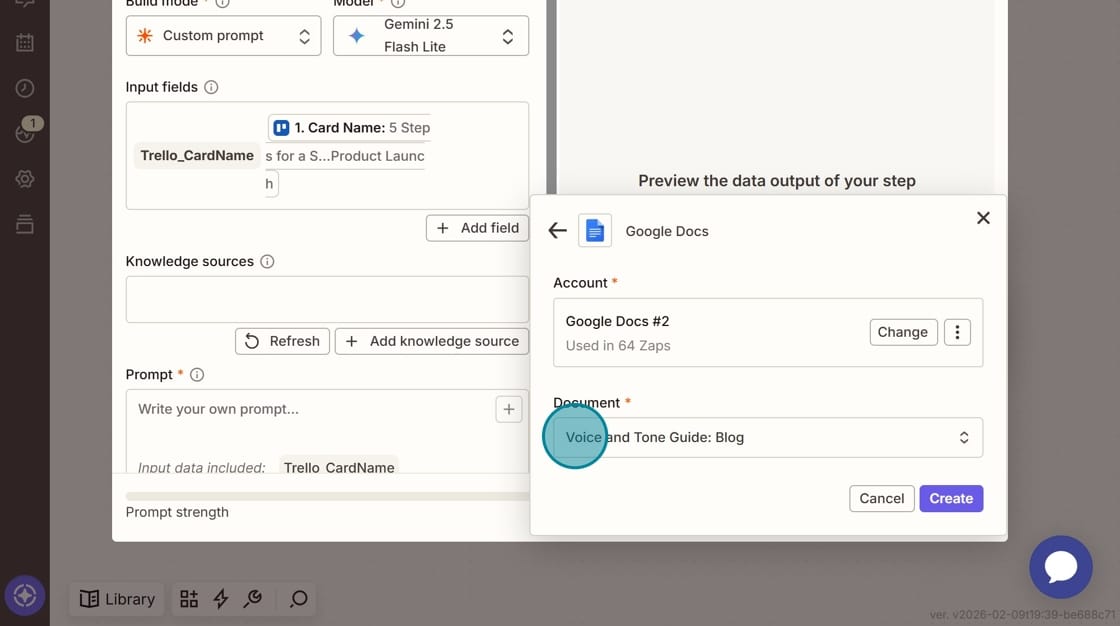
You can add more than one Knowledge source to the prompt.
Step 4: Write your prompt
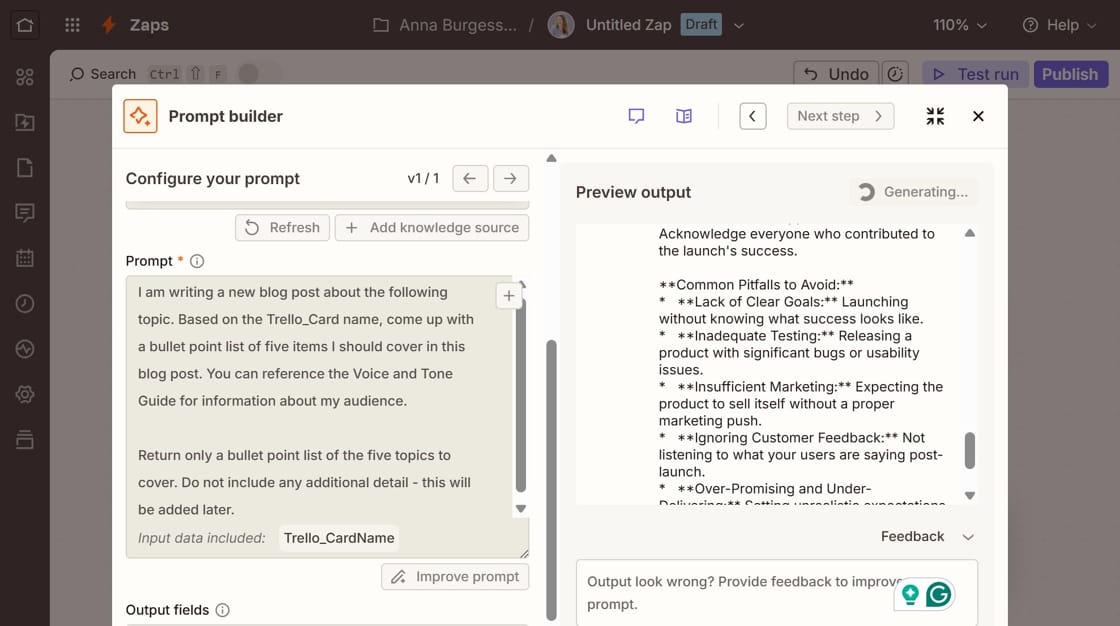
Click Create and write your prompt. Here's my example:
I am writing a new blog post about the following topic. Based on the Trello_CardName, come up with a bullet point list of five items I should cover in this blog post. [it keeps going]
You can see that I'm specifically instructing AI to look at my Input field. The field will automatically be included – you don't have to do anything. But if you have multiple fields, you need to let AI know how to use the different fields and what they mean.
At the bottom, you'll see an evaluation of your prompt strength. I usually ignore this because a lot of the context is stored in my Knowledge sources. So even though the prompt itself might be fairly basic, I'm still giving the AI what it needs.
If you don't have any Knowledge sources, you want to pay more attention to the prompt strength.
You can also generate a Preview of your output. If it wasn't what you were expecting, refine your prompt.

Step 5: Create your output field
The Output field is your result. The data needs to "go somewhere" so you can use it in a subsequent step.
Click on Add field.
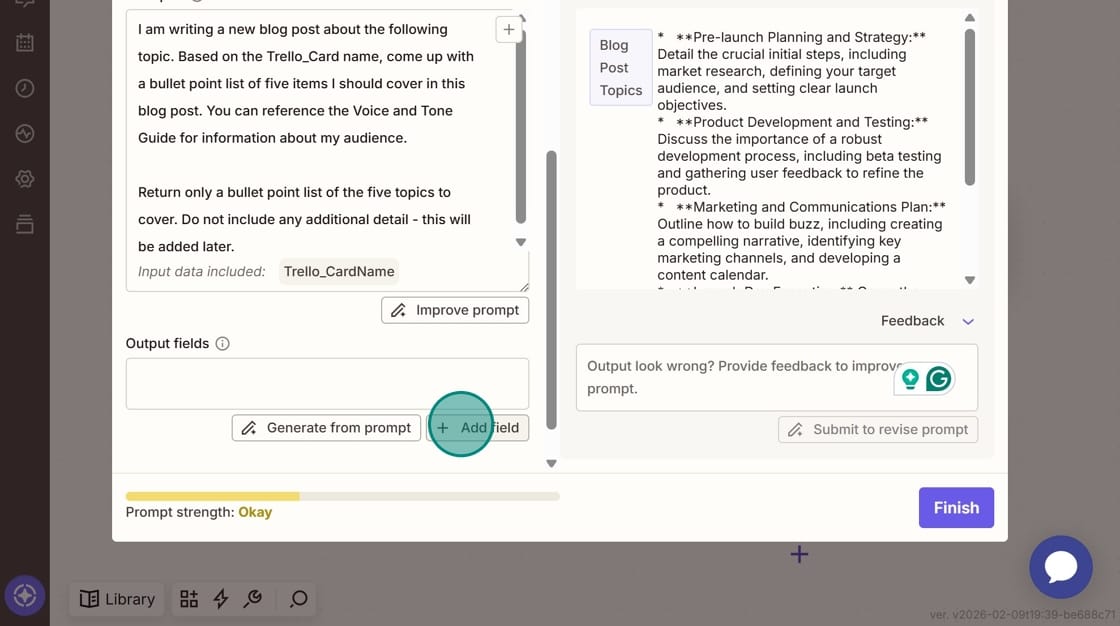
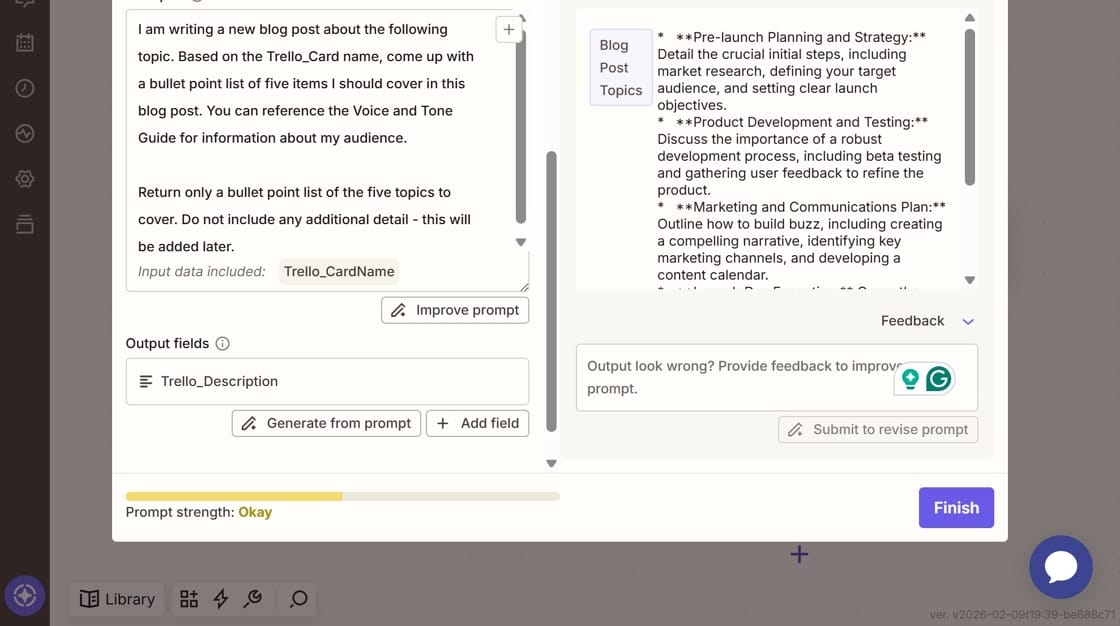
Give your output a Field name. In this case, I'm identifying what I want to do with the field, which is send it back to Trello in the Description field. You might also write a more generic output Field name, if you plan to use it in multiple steps.
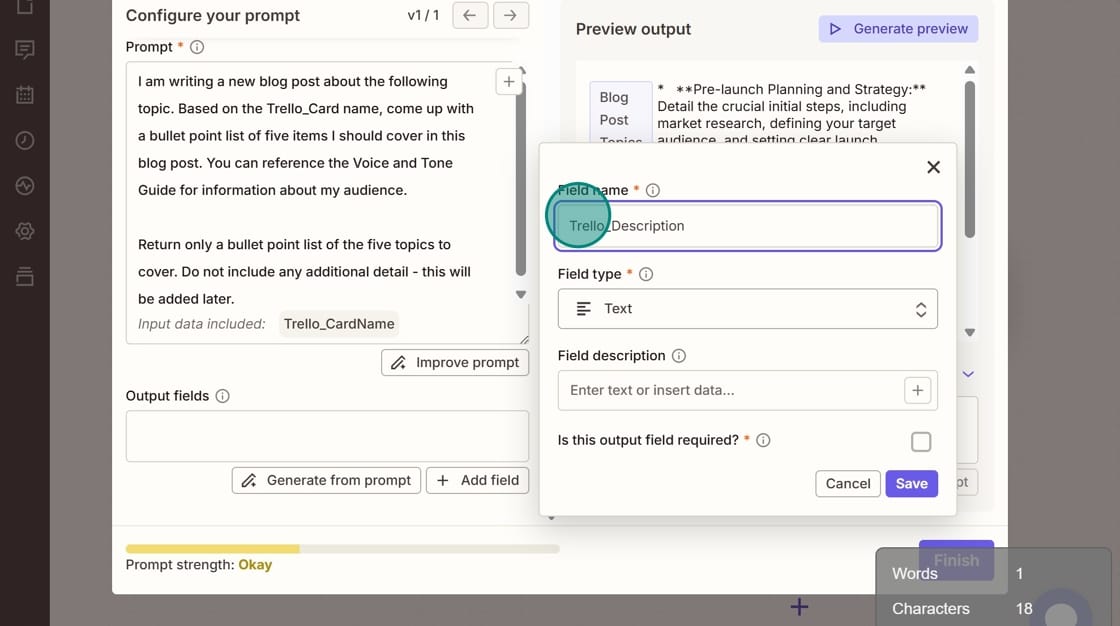
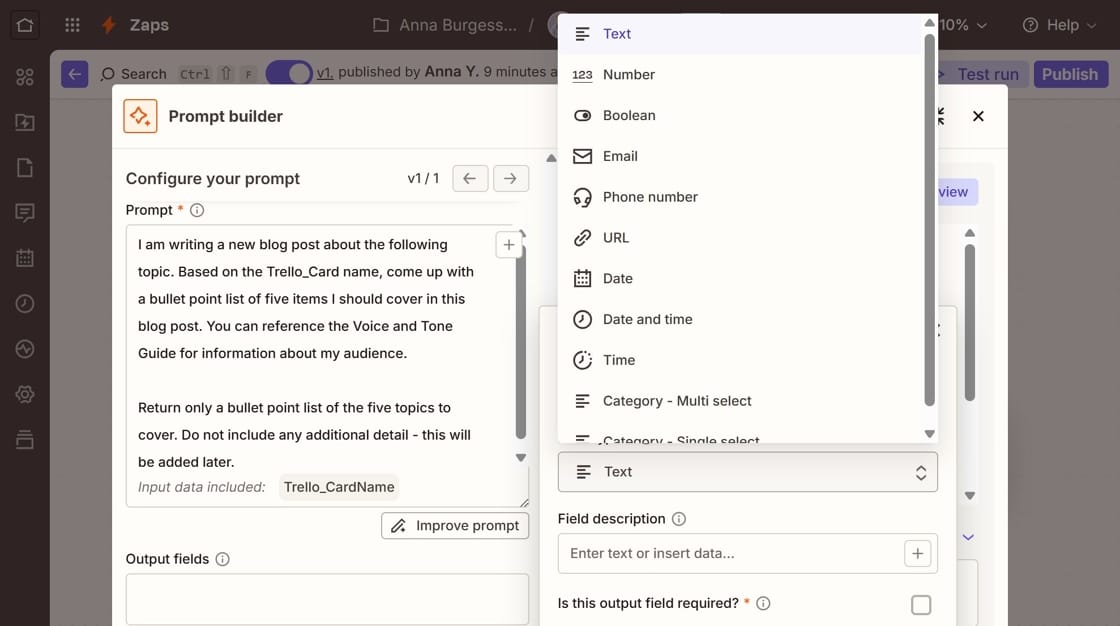
Select a Field type. My output is text, but you can select from a wide range of field types.
Click "Create" and then you'll see the Output field listed. You can create more than one Output field.
Step 6: Use your AI by Zapier output in a subsequent action
Now that you have the Output field, you can use it in any subsequent step.
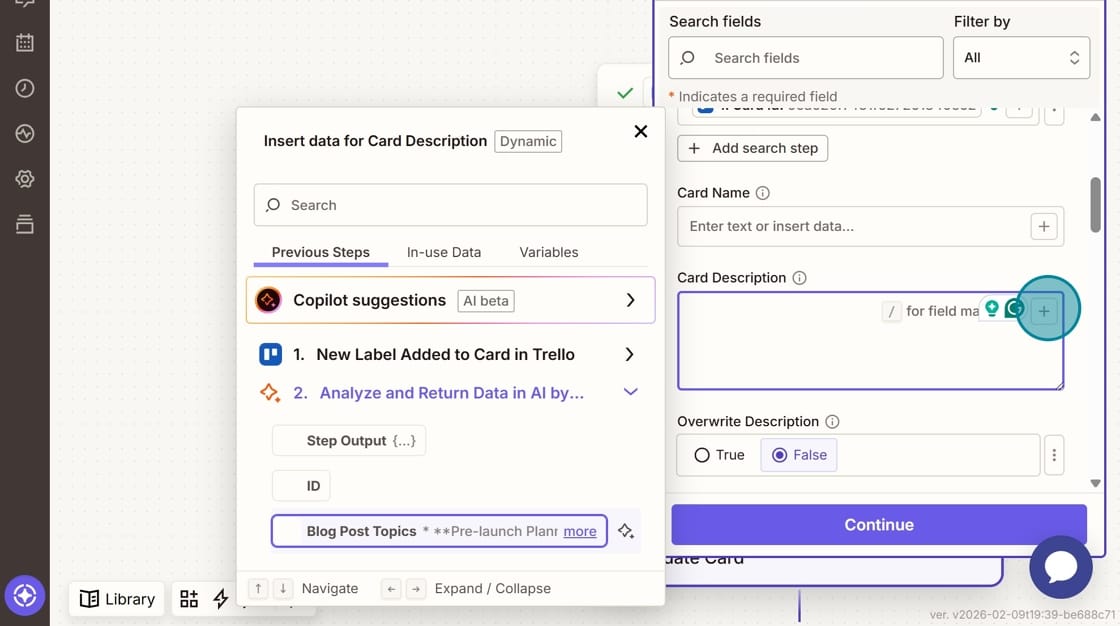
For example, I want to send my output back to my Trello card. I add another Trello step to my Zap to "Update Card." In the Card Description field, I select my Output from my previous step by clicking on the (+).
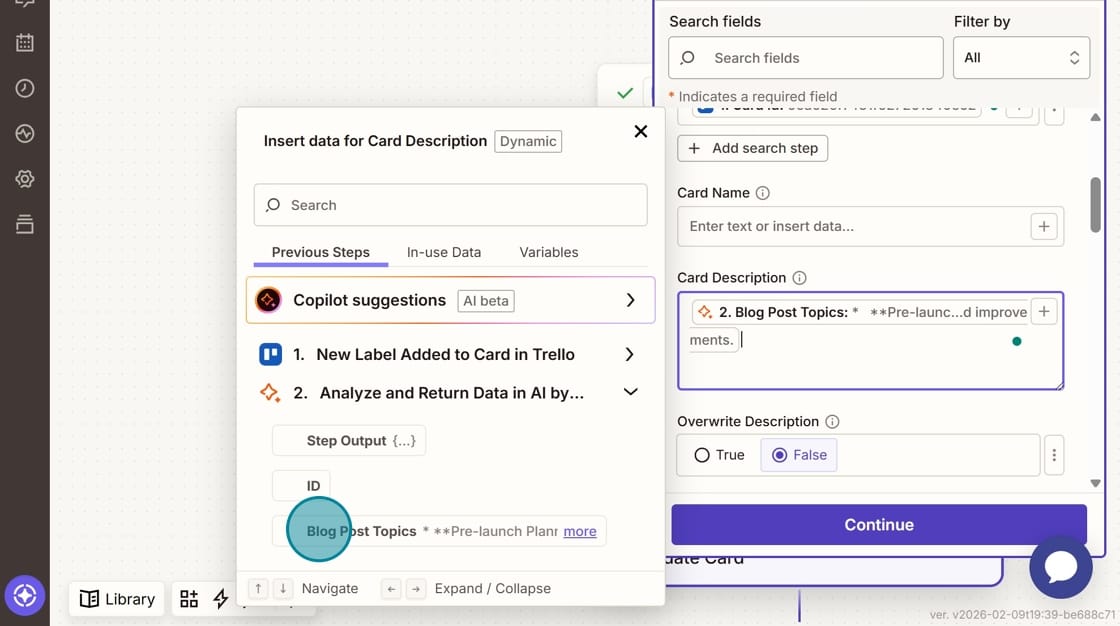
This is what it looks like with the AI by Zapier output added.
Pro tips:
- Always add Knowledge Sources from external apps (like Google Docs) instead of uploading files. That way, your prompt stays fresh even if your Knowledge Source changes.
- Test different models to find what works best for your specific use case.
More resources:
Check out my free guide for tools you need
at different stages of your business.